ROUTING GUIDE FOR NECK BINDING AND/OR WOOD PURFLING.
At the moment, I don't have any plans to add wood purfling or other trim
below the fingerboard white binding and thought I would add pixs of a small
custom made horseshoe shaped router foot I used in the early 1970s to install wood purflings
that went on the Granada, #5 Deluxe, #6 and #4 along with other custom
bindings/purflings requested. Installing wood purflings below the neck
binding can get tricky and touchy because if you route the binding at a 90
degree angle or parallel to the fingerboard, you run the risk of your wood purfling, etc. being very thin
where the neck curvature starts, especially with a 3/16 inch thick
fingerboard and a taller combination of wood purfling and binding. Gibson
and other pre-war instrument manufacturers solved that problem by installing the
binding and wood purfling at least 6 to 11 degrees or more from
perpendicular or at a right angle to the fingerboard.
Most modern day makers install the binding at a 90 degree angle and try to
blend the curve which means the binding and/or wood purfling is very thin at
the bottom side especially with any wood purfling and binding less than .040
inches in thickness. I guess as long as you don't run out it is ok but
there is a better way to do it and keep a full thickness of the wood
purfling and binding on the bottom side and the feel of the fingerboard
blending into the radius portion of the neck is a plus. My method
which is nothing but basic woodworking routing, however it is not 100 percent
fail safe. I have messed up probably
three necks over the years by letting the neck blank slip and had to install a (taller)
binding that didn't match the original and had to build another neck for the
customer. The neck that didn't match the original specifications was
sold/traded to banjo makers with wood purfling to match another resonator,
etc. I will try and explain the best I can how the horseshoe router foot works
using a table router. There are other ways to accomplish this task and
a drill press at high speed with the proper bearing and cutters will work
just as well and might be a little more fail safe but you have more chisel
work to do at the nut end because of the diameter of the cutter you are
using. I made a mock fingerboard section out of a piece of white oak
and a scrap piece of cedar to simulate the neck blank. I basically cut
the fingerboard section freehand on the band saw and if had taken the time
to set up my old fingerboard profile fixture which I don't have the proper
clamps anymore that fitted that fixture; the finished mock fingerboard route would have been nearly perfect and what ever
imperfections you have on your fingerboard profile, it will show up in the
route for the binding/wood purfling.
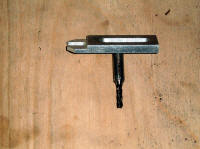
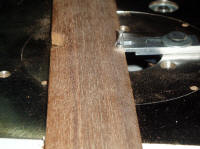
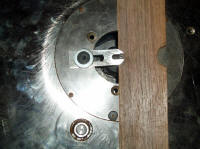
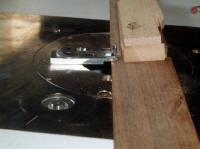
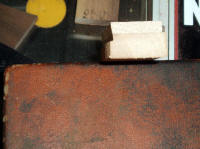
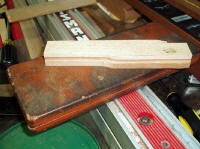
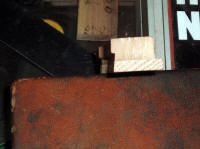
What makes this procedure work is the horseshoe guide has a 3/16 inch slot cut into
the foot end that rides or follows the fingerboard profile and with a 3/16
inch diameter spiral solid carbide router bit that is set for flush cut the
same way that a pattern, template or laminate trimmer bit works. The
end of the horseshoe foot also has an angle ground to match the angle of the
wedge underneath the fingerboard which give the required angle from 90
degrees and allows the router bit to start its angular cut at the top
leading edge of the fingerboard. The wedge that I am using above is
scrap material from a fixture that I made for a turkey call and pretty close
to what is needed for a pre-war Gibson neck. Unless you have a way to
change the angle of your router table and/or router, the wedge is one way to
get the angle needed. You could also go to a special ground cutter but
you would need one for each width (height) of the binding and wood purfling
used which could get expensive. This method has adjustability since
you raise the router bit the required depth of cut that you need. In
essence, the end of the horseshoe guide is thin enough to ride the edge of a
1/8 inch thick profiled fingerboard and will cut the angle right to the top
edge of the fingerboard the way the pre-war ones was done. Pix on the
bottom row left, is the route made with the required angle and the next pix
shows the mini-test fingerboard routed including the 5th peg area which is
the critical area where if you are not careful, a mistake can be made if you
don't keep the fingerboard flat against the taper wedge and perpendicular to
the horseshoe guide. As with anything, you need to practice and test
the set-up on scrap material to be certain you have the router bit set for
flush cut. Properly set-up and paying attention, this method is nearly
fail safe but not 100 percent if you get careless as with most things.
The router bit I used above was an up-cut for a plunge router and not a
table router and a down-cut bit would be better. Since you are cutting
against the grain around the 5th fret area, great care and caution must be
exercised and a key to making it work is to have your neck blank trimmed of
excess material, leaving only about 1/16" from the edge of the profiled
fingerboard which will render a much cleaner, chip free cut. There
will be some clean up around the 5th fret area but not enough to be overly
concerned about. A file that cuts on the side only can be used to
touch up any imperfections along the router cut made. You could use a
small router and do it from the fingerboard side, but you still have to make
yourself a custom guide or foot that is small enough to address the 5th
string curvature area and a wedge to ride the fingerboard to get the proper
angle of the route. The straight portions of the fingerboard is a
"piece of cake" to do with this method and with a little practice, you can
tackle your actual neck blank which is a little intimidating the first few
that you do. I should have taken a pix of the fingerboard while it was
positioned against the horseshoe guide but I guess a senior moment is ok
from time to time....grin if you must! I did take a pix of the
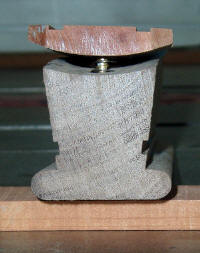
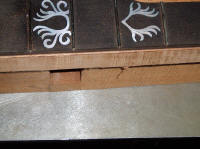
"mock fingerboard/neck piece" with the fingerboard side down which
shows a little better view of the angle of the binding and/or wood purfling
route and you can see the 5th fret curvature as well. With the 6
degree (approx.) angle of the cut, it is much easier to blend into the curve
of the actual neck wood which you can certainly feel the difference versus
the fingerboard being at a 90 degree and then you start your curvature of
the neck shape. As I eluded to earlier, you can only taper the bottom
portion of the neck binding/wood purfling but so much since most are around
.040 inches in thickness. Without a well made horseshoe guide with the
correct angle at the tip end of the shoe or foot area, router bit set for
flush cut at the bottom edge of the foot that makes contact with the
fingerboard, you will not be able to route an angle starting at the
top edge of the fingerboard to the required depth that you need. As
you can gather from the pixs, this horseshoe guide and the router table with
the wedge does work!
I am sure there are many other ways to accomplish the same thing; some more
elaborate and others much less. It depends on how deep your pockets
are (how much money you want to spend) and how many necks you plan to do. A production environment today
could easily use a CNC router since every stage of production would be
fixture controlled allowing the next procedure to have a reliable accurate
base to work from. Also, a dedicated shaper spindle rotating clockwise
or overhead pin router properly set up could accomplish the same thing with
great speed, accuracy and far less chance for wood tear out. The above
approach is for those with shallow pockets...grin if you must!
The last pix is of a turkey box call in the rough which has routing
completed for # 4 pre-war wood purflings. Since there are no curves on
the box call sides and top of the lid, a different approach was used but the
same principle applies to get an angular cut and route.
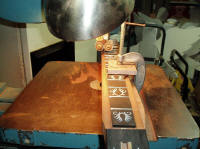
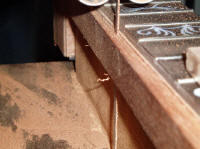
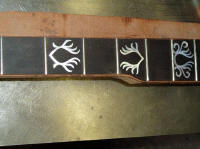
Above pixs of sawing the excess neck blank down to about .045 inches from
the edge of the fingerboard for the binding to rest against. It has
been over 10 years since building an instrument neck and trying to band saw
to the edge of the marked line was a little nerve racking. As with
most binding installation, having just enough room for the binding and/or
wood purfling to fit into without excess wood overhang below the binding
and/or wood purfling allows the binding and/or wood purfling to be pulled
tight against the fingerboard and tight against the bottom portion as well.
I will remove any excess material on the outside of the black inked line on
the neck blank with a regular bastard cut file. I did notice a couple
places that the band saw blade drifted inside of the black inked line a
little but should be able to "salvage" that "boo boo".
A dedicated cutter with the proper ball bearing guide on a heavy duty shaper
would definitely work better but for a single neck or two, this procedure
above will suffice if your hand eye coordination is good enough and you
haven't had too many cups of regular leaded coffee....grin if you must!
Heavy duty masking tape works fine for binding installation if everything
fits as it should. In the "ole days", I used a variety
of different items such as a large fly line and narrow cloth material to
pull the binding and wood purflings tight against the fingerboard and neck
blank. I will probably do only one side of the neck binding at a time
on this project due to instrument making inactivity and I believe I use to
install both sides at the same time but I was doing that type of stuff on a
regular basis which does make a large difference in the quality of your
work.
I plan to soften the the binding up for the curve at the 5th fret with hot
water and pre-shape it before I install the binding. I will do a test
run on scrap material using Duco cement and IPS
Weld-On # 16
sold by Stewart MacDonald before I bind this neck. There are quick setting glues
available that many craftsman currently use but I do not have any experience
using them and better stick with what I have used in the past. I
purchased Ambroid cement from Science Hobbies, Inc., in Charlotte, NC
and they are still in business and might give them a call and order a tube.
Ambroid was my favorite since it was not as aggressive as Duco cement but
worked great on bindings. I used the same product that Gibson used for
bindings but cannot remember the product name but it was far too aggressive
for me.....you could not use any excess since it would literally melt your
bindings in a hurry!
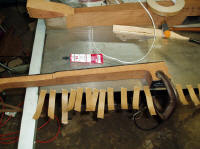
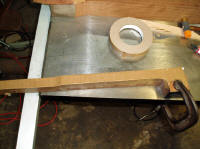
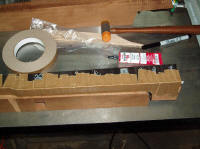
I decided to go with the Weld-On # 16 that Stewart MacDonald sells and
using their binding tape which is very strong. I first pre-bent the
binding for the 5th string side under very hot water and shaped it enough to
make the curve and laid out some tape on the edge of the table saw table.
I clamped the heel end of the neck down onto the table since I don't have a
dedicated fixture or jig to hold the neck blank while installing binding
which does free up one hand. A thin coat of the Weld-On cement was
applied to the side of the fingerboard and neck blank and the binding was
quickly taped in place making sure the binding was flush and tight against
the bottom of the binding that makes contact with the edge of the neck blank
and parallel to the fingerboard too. Hopefully, the tape was applied
tight enough and the amount of tape I used was an overkill for sure.....grin
if you must. I will allow the binding to dry about 24 hours and apply
the other side.
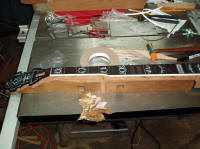
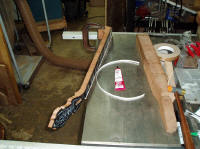
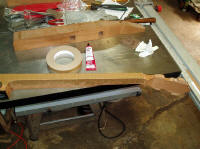
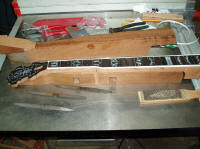
I could have used 3/16 inch tall binding instead of 1/4 inch since I plan to
file it down flush with the fingerboard and not have any binding resting on
the ends of the fret wire and will file about a 30 degree angle on the fret
ends or whatever looks ok.
FILING DOWN BINDING AND TAPERING FRET ENDS
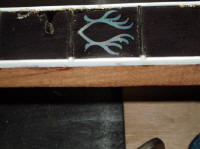
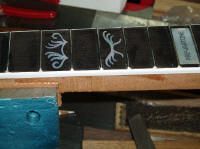
Below pixs of filing the binding down level with the fret board and also
tapering the ends of the frets:
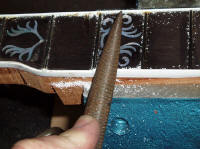
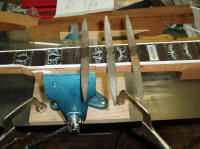
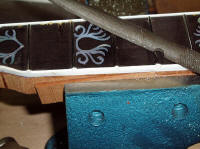
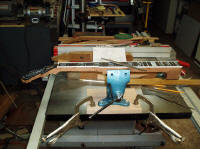
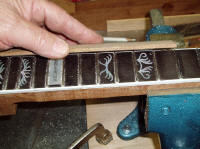
I used a few small rasps made by Union Abbye and Grobet which are Swiss made
and purchased them back in the late 1960s from Ferre's Band Instrument
Repair Supply, Battle Creek, Michigan and the early 1960s rasp has a more
pointed tip is worn out on the fine end, however the rough cut end is still
operational. The later ones were purchased in the mid 1970s and still
cut fine. I used the rough end of the rasps to get rid of the binding
material pretty fast and finished up with the smooth end of the rasp.
After removing the material from between the frets, I removed the binding
that was abutting the end of the frets....some makers leave it intact but I
personally don't like it. I used a fine flat bastard file modified
with the edges ground off the sides and had a slight radius on them to help
protect the fingerboard. Between the file and 150 grit sanding paper,
I filed a 60 to 45 degree angle on the fret ends depending on which point of
reference you use to get your angle from. I will finish dressing up
the frets ends later with a couple fret dressing files from Stewart
MacDonald and slick them up with finer sanding paper and steel wool, but
that is it for now on the binding and frets. I will trim the binding
length at the nut end prior to the nut installation and flush up the binding
at the heel later on as well.
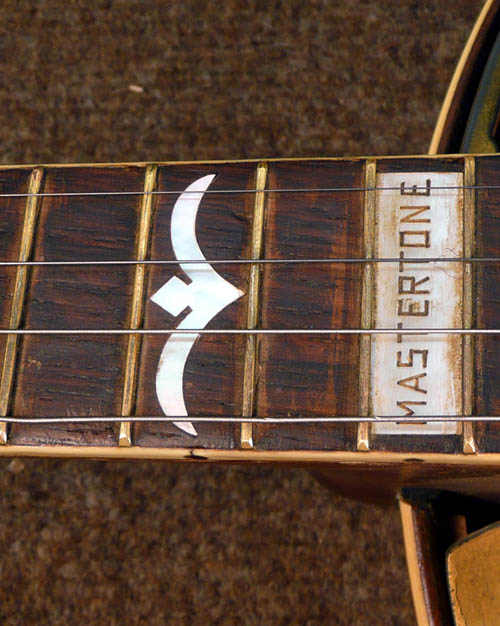
Below pix of a typical Gibson Great Depression Era banjo fret installation
technique: fret ends flush with the edge of the fingerboard, binding flush
or level with the fingerboard and fret ends and fret ends tapered about 60
degrees + or - .
LEAVING ON A
SPIRITUAL NOTE
If you do not know Jesus Christ as your Lord and Savior, please take this
moment to accept him by Faith into your Life, whereby Salvation will be
attained.
Ephesians 2:8 - 2:9 8 For by grace are ye saved through faith;
and that not of yourselves: [it is] the gift of God: 9 Not of works, lest
any man should boast.
Hebrews 11:1 “Now faith is the substance of things hoped for, the
evidence of things not seen.”
Romans 10:17 “So then faith cometh by hearing, and hearing by the
word of God.”
Open this
link about faith in the King James Bible.
Romans 10:9 “That if thou shalt confess with thy mouth the Lord
Jesus, and shalt believe in thine heart that God hath raised him from the
dead, thou shalt be saved.”
Open this
link of Bible Verses About Salvation, King
James Version Bible (KJV).
Hebrews 4:12 “For the word of God is quick, and powerful, and
sharper than any two edged sword, piercing even to the dividing asunder of
soul and spirit, and of the joints and marrow, and is a discerner of the
thoughts and intents of the heart.”
Romans 6:23 “For the wages of sin is death; but the gift of God is
eternal life through Jesus Christ our Lord.”
Romans 3:23 “For all have sinned, and come short of the glory of
God;”
Micah 6:8 “He hath shewed thee, O man, what is good; and what doth
the LORD require of thee, but to do justly, and to love mercy, and to walk
humbly with thy God?”
Philippians 4:13 "I can do all things through Christ which
strengtheneth me."
PREVIOUS PAGE
NEXT PAGE
BANJO CONSTRUCTION HOME PAGE
