HOT WATER HEATER INSTALLATION
Our electric hot water heater was installed in 1994, therefore is twenty (20) years old and it was installed by our neighbor
Johnny
Hildreth who died in 2009. Johnny was the best neighbor
and friend one could hope for and my bride and myself certainly do miss
him. I have pixs of him at some of our various
Christmas and other
functions that is annotated throughout
this website and I will link to them.It was a week or two ago that I
noticed some water near the base of the hot water heater and it was
evident that it was leaking somewhere around the top heating element and
with the age of the unit, it was time to replace it versus attempting a
repair. This is a 40 gallon capacity hot water heater
manufactured by A. O. Smith and what they refer to as a short model.
I believe it was 44 inches in height and it was elevated on a couple
pieces of square tube and channel iron to bring it up to the desired
height for easier plumbing in.
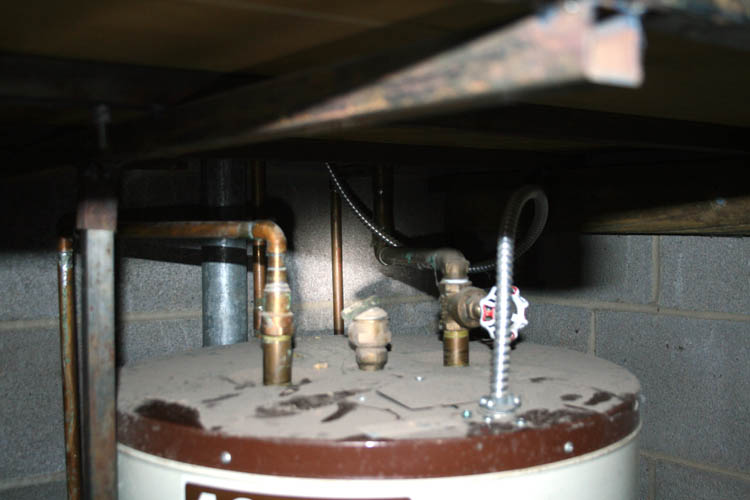
Above pix of the existing hot water heater and plumbing. I
might have drained water from the tank at least one time in the past,
but not sure.
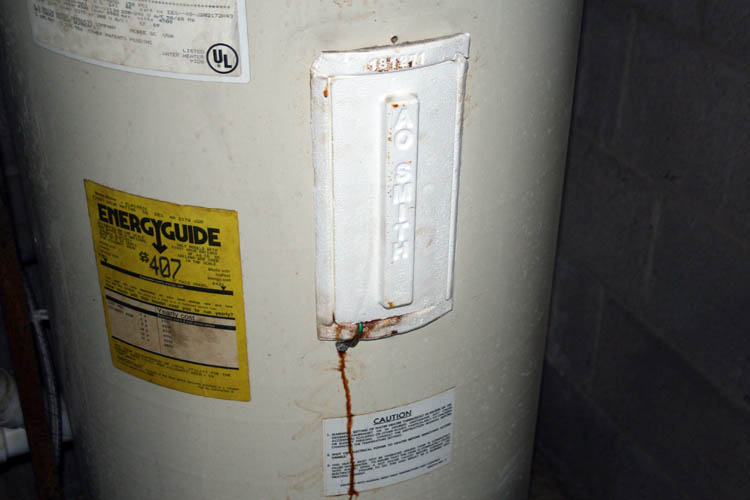
Here the water leak is visible and I earlier removed the Styrofoam
protector to verify where the leak was coming from.
Normally when it comes to major plumbing repairs, I tear up more
stuff than I fix, grin if you must, but after viewing many YouTube
videos, I ascertained that this project was doable in my humble opinion,
especially with fittings and couplings that do not require soldering.
It has been over forty (40) years since doing any copper pipe soldering
and here in Anson County, North Carolina, there is definitely a shortage
of qualified and certified plumbers and will leave it at that!
GOING BACK IN TIME
Going back in time to the early 1960s, of which I helped wheel barrow
brick and mortar during the summer months for my uncles Doug Coley and
Baxter Bowers, there were several good plumbing contractors and plumbers
in our town of Wadesboro, NC and will mention those that I remember:
Coggin Brothers, Johnny Wagner, Jimmy Ormsby, Johnny Hildreth, Jack and Dorton Gilmore and there were a few others
that I cannot recall at this time. Most of the plumbing was either
copper or black iron pipe and the sewage drains were of cast iron.
Materials used today have definitely changed with PEX replacing
copper lines since it is less expensive, more flexible and easier to
install. PVC definitely has a lion's share in the plumbing
industry and last longer than PEX.
BACK TO THE INSTALL
As with my normal MO, modus operandi,
got side tracked and went on line and found a 40 gallon capacity hot water heater
manufactured by A. O. Smith available at Lowe's in Rockingham, NC , however it was 50 inches in height versus
the 44 inches in height of the old unit. I got the tape measure
out and figured it would fit to the existing plumbing if I leave off the
square tubing and channel iron base supports.
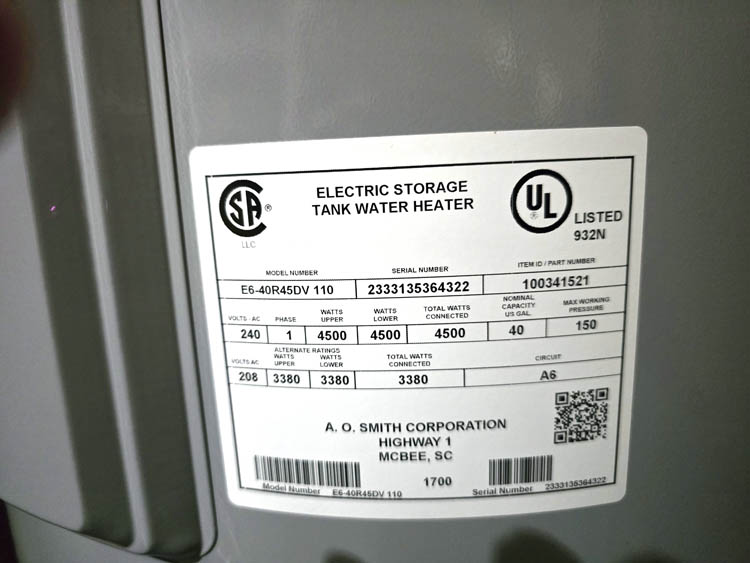
Above pix of info on the replacement hot water heater and below a
close-up pix of the old unit:
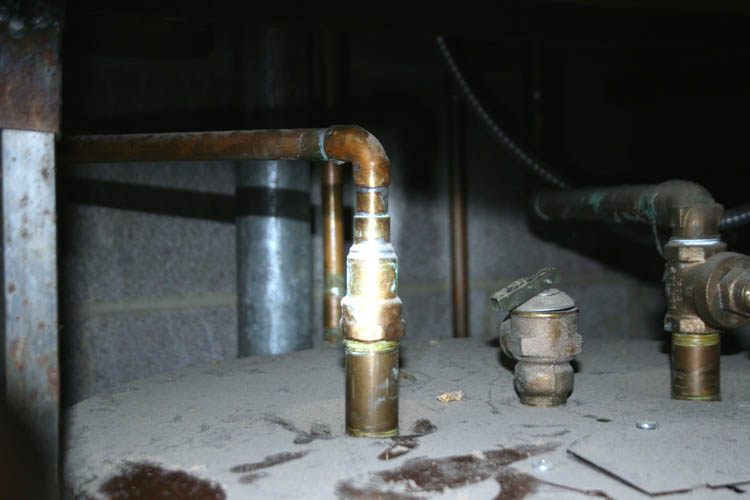
There definitely is a lot of soldering on the hot water side of the
hot water heater to bring the connection up to the hot water line.
TOOLS REQUIRED
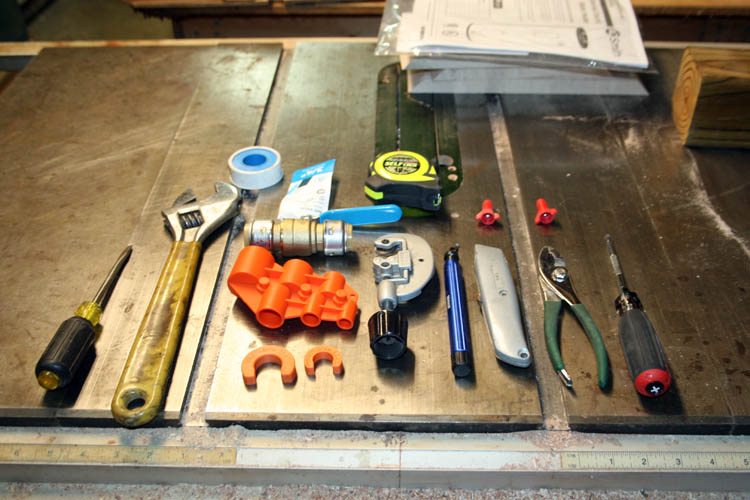
After getting into the hot water heater replacement, I needed a few
additional things such as nut drivers and a short Phillips # 2
screwdriver and of course some extra lighting. I did use an
electronic voltage tester, but I have not been impressed with them, but
would rather use a volt/ohm meter instead.
LETS GET STARTED
First order of business was to trip the breaker for the 240 volts AC
at the breaker box aka power panel to the hot water heater. I then
closed the incoming water line value to shut the water supply off.
I attached a water hose to the drain outlet on the hot water heater
tank and ran the hose outside under the basement garage door. The
faucets were opened up in the house and the screw was opened up on the
tank valve, however no water came out the hose when the value was
opened. I then used my air compressor to blow air through the
water hose into the tank and then the unit started draining. I
probably took over two (2) hours to drain the tank, due to
sediment deposits on the bottom of the tank near the drain valve which
restricted the water flow from the tank.
Once the water was drained from the tank, I then proceeded to cut the
1/2 inch and 3/4 inch copper lines to the tank and then removed the
power cable to the unit. Since there was a shelf over the hot
water heater, it was close quarters to get a standard pipe tubing cutter
to make a full 360 degree rotation on the 1/2 inch copper line, however it cut the tubing ok.
Both lines were deburred using a Shark Bite deburring tool which is also used
to mark the length of the tubing that goes into the Shark Bite fittings.
Before doing the above, I had to disconnect the dryer and relocated
it out of the way in my basement woodworking shop.
The old hot water heater was removed and I dragged and/or walked the
unit to the basement garage door and placed it outside for later
disposal.
I had earlier marked the hot and cold water line where it needed to
be cut and needed about three (3) inches length of the 3/4 inch copper
tubing to connect from the water supply cut off valve to the Shark Bite
line to the tank which was 12 inches in length. I cut the 3/4 inch
supply line about 2 inches from the elbow in the line.
I applied 4 to 5 turns of Teflon tape to the hot water and cold water
FIP connection at the tank.
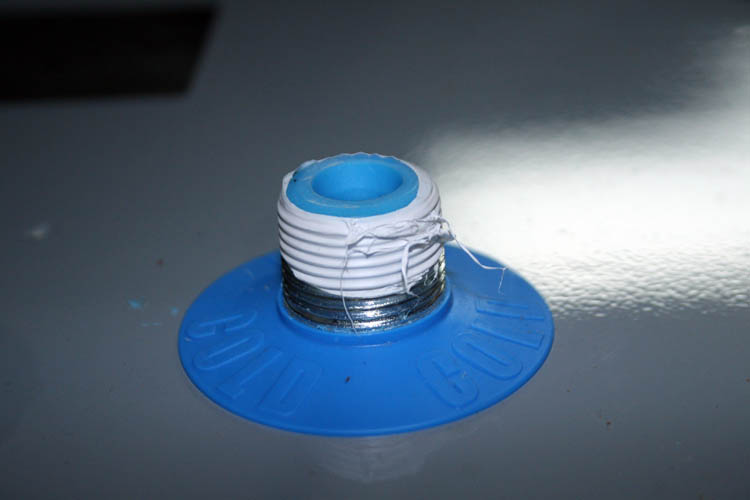
When applying the Teflon tape, you wind in a clockwise direction.
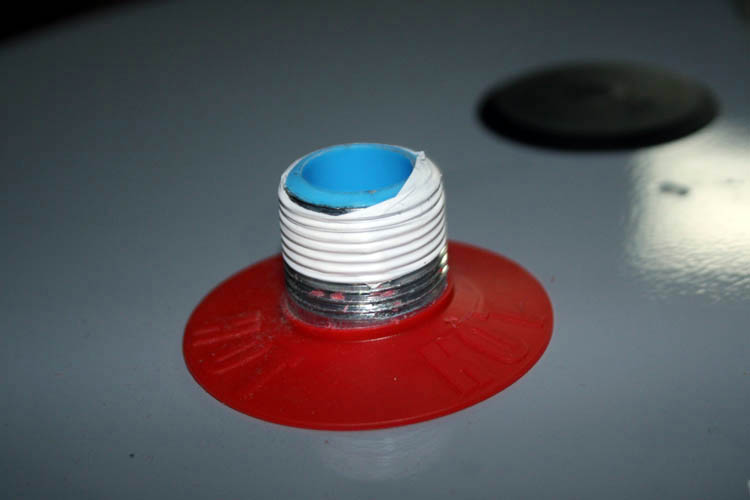
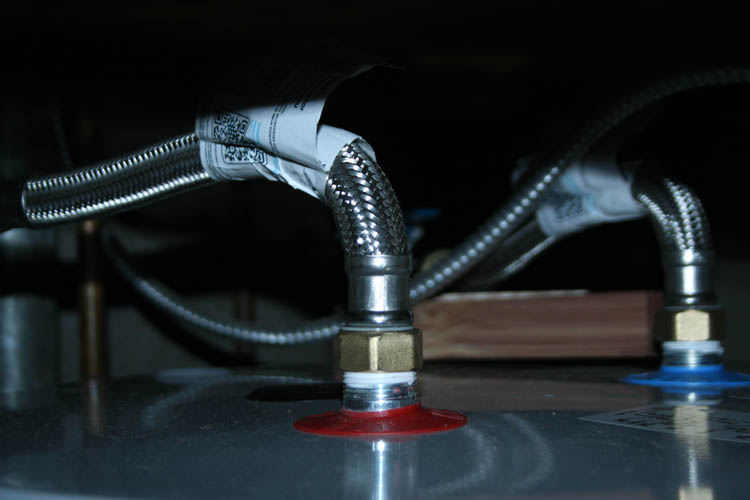
The Shark Bite Max stainless steel braided water hoses were connected
to the hot and cold water lines and I then turned the main water supply
line on to check for any leaks and there were none. I did notice
that the cold water supply line Shark Bite stainless steel hose did
distort some due to the tight bend to make the connection. If there
is a problem in the future, hopefully not, I will have to go to plan B and get a right angle Shark
Bite fittings for the 3/4 inch cold water supply line to the in line
Shark Bite ball cut off valve which will raise the braided line upward
reducing the tight angle bend at the tank connection.
Next was to connect the 240 volt AC line to the unit using twist lock
connectors and placed the steel cover over the connections.
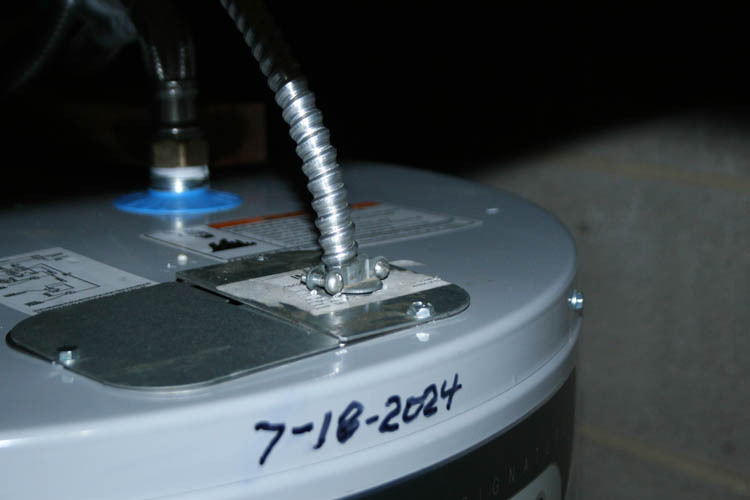
The in line Shark Bite ball valve was opened and water was allowed to
drain into the hot water heater tank. I left a couple faucets, hot
water side open to purge any air out of the hot water heater as the tank
was being filled with cold water.
As stated earlier, no leaks were detected and the acid test was to
turn the power back on to the unit and check for any leaks since when
the water is heated up, the pressure will build up in the tank. I
ran hot water from a sink to allow cold water to fill back into the hot
water heater tank and allowed the heating elements to do their thing.
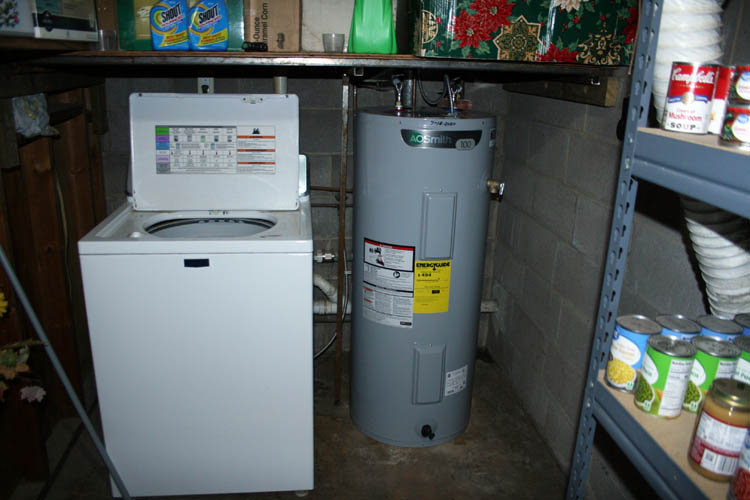
So far, there are no leaks and hope the Shark Bite fittings will
perform as they should. I believe I did my part getting the copper
pipes prepared for them and pushing them to the marks made on the copper
tubing. It did take some effort to seat the fittings properly.
Tomorrow, our Lord willing of course, I will connect the dryer back
up and give our utility department a call to come by and pick up the old
hot water heater. Lowe's charges a $ 3.00 disposal fee
for the old tank. I wonder where those funds end up, grin if you
must!
HOT WATER TANK AUTOPSY
I wanted to see how much sediment was in the hot water tank and
decided to cut open a panel out of the bottom section.
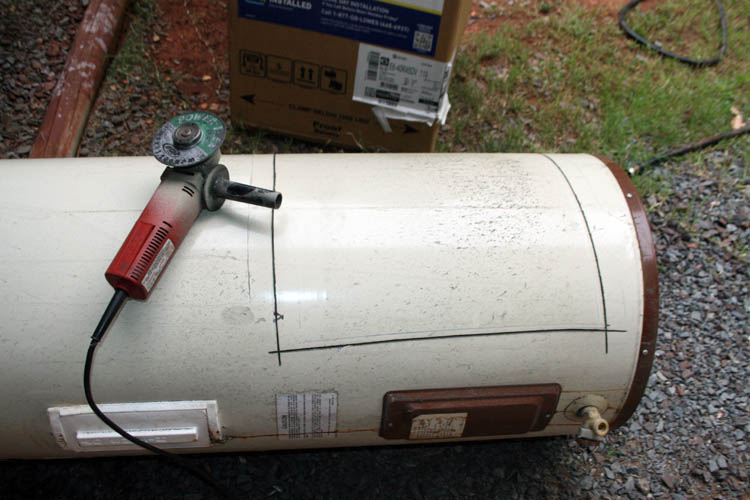
My Milwaukee small angle head grinder with a 4.5 inch diameter
friction cut-off wheel was not larger enough to go through the walls of
the tank which had a 2 inch thick insulation. Therefore, I had to
skin aka peel the outer metal cabinet housing and then remove the
insulation giving me access to the actual water tank itself.
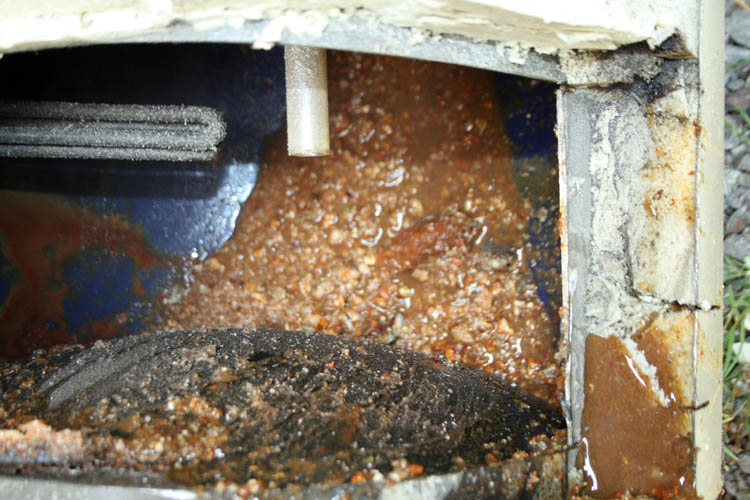
As evidenced by the above pix, there was a considerable amount of
sediment deposited in the water tank and that is why the tank drain
valve would not allow water to escape from the tank until I forced air
through the valve cutting loose some of the sediment. The hot
water tank is resting on its side when this pix was taken. The
bottom of the tank is dome or convex shaped for strength and evenly
distributes the weight of the water better. The top of the tank is
also dome or convex shaped.
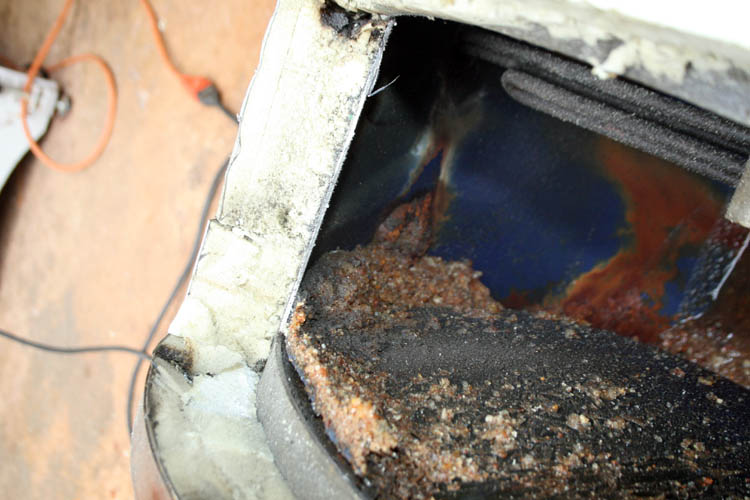
There is a blue glass coating on the inside of the tank and quote from
the internet: "In 2004, A. O. Smith reaffirmed its mastery of
glass lining technology by introducing patented Blue Diamond™ glass
coating on its best Conservationist® residential water heaters.
Blue Diamond™ provides the ultimate protection… over twice the corrosion
resistance compared to industry-standard glass lining."
The left portion of the inside of the tank is where the valve is in
the tank and you can see the sediment deposited all around the valve.
I turned the water tank upright and drained most of the existing
water out for photographic purposes. I might scoop out most of the
sediment and ascertain how much was left. There was a good amount
that exited when I placed the tank upright and on its side.
CLOSE UP OF SEDIMENT AND MAGNESIUM ANODE ROD
I scooped out the sediment from the tank and found what was left of
the magnesium anode rod.
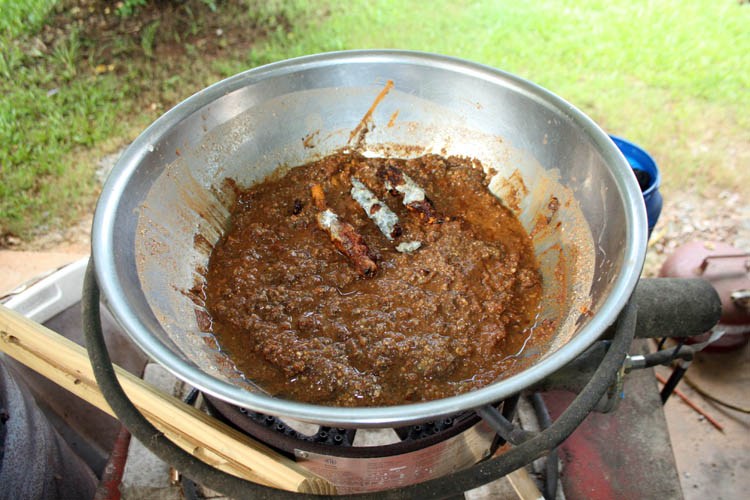
I didn't measure the amount of sediment, but it is at least a gallon
and found what was left of the magnesium anode rod which was just about
totally eaten away. The rod hangs from the top of the tank and is
a few feet in length.

Close-up pix of the remaining magnesium anode rod.
All the water did not drain from the tank, but most of it did and due
to the restriction of the sediment at the output valve, it took about
two (2) hours to drain the tank which was then manageable even for an
old man, grin if you must!
I did not see a magnesium rod which no doubt was eaten away to help
get rid of some of the calcium deposits.
I think the majority recommend you drain the tank yearly to help
remove the deposited sediments from the tank.
TANK WALL THICKNESS
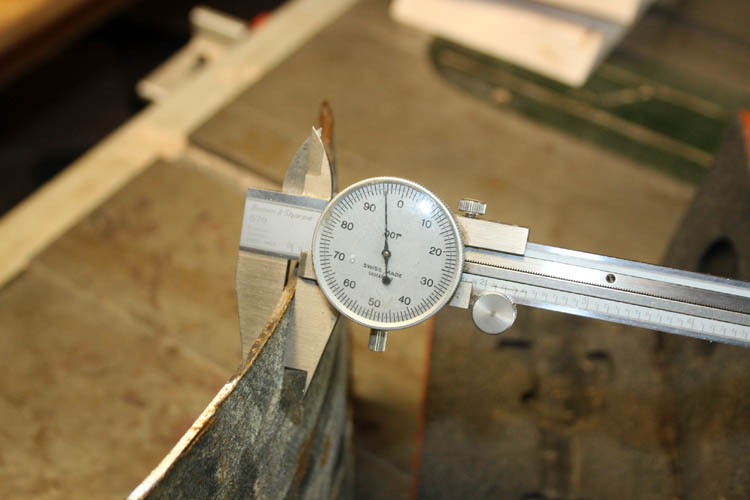
The tank wall thickness is a little over 3/32 inch thick and showed
no sign of corrosion and this unit was very well made.
DIDN'T DO ENOUGH RESEARCH USING SHARK BITE BRAIDED
STAINLESS STEEL HOSES
I recently reviewed several complaints and issues using the Shark
Bite stainless steel braided hot water heater hoses and there definitely
is a problem with the interior black plastic lining breaking down with
black flakes getting into your hot water supply. In fact, there
is a lawsuit against Home Depot and Reliance Worldwide addressing those issues that is making its way into the
court system as I type.
I went on line and filled out a form at Reliance Worldwide asking if
any changes had been made to the rubber plastic lining in the Shark Bite
braided stainless steel hoses.
I received a reply from Reliance Worldwide, however they did not
address my question, but gave hyperlinks if I wanted to file a claim, of
which I do not!
I plan to replace the Shark Bite hoses with PEX pipe as soon as
possible and will get a refund from Amazon for the Shark Bite stainless steel braided plastic
lined hot water heater hoses.
I guess this is a product of myself being too frugal not wanting to
pay a plumber to
solder copper pipes back in place. Sometimes, I am my own worst
enemy for such things, grin or frown if you must. I need to learn
to solder copper pipes again and get the current updated solder and
flux; old school flux stuff was acid core and 60/40 and corrosive as
evidenced by old copper pipes turning green where the flux was left on
the pipe.
REPLACED HOT WATER HEATER HOSES
I replaced the Shark Bite stainless steel braided hoses with PEX
and had to add the appropriate Shark Bite fittings for the 1/2 inch and
3/4 hex pipe and the 3/4 inch FIP connections to the hot water
heater hot and cold. Prior to making the PEX connections, I turned
the power off to the hot water heater and turned the input cold water
valve off to the hot water heater tank. After the connections were
made, checked for leaks after turning to cold water input valve on and
then tripped the 30 amp. breaker to the on position and purged the hot
water line(s) and checked for leaks and everything looked good, no
leaks. There is some local codes that prohibit placing
PEX directly to the hot water heater, especially if it is a gas unit
and required at least 18 inches or more before adding to PEX.
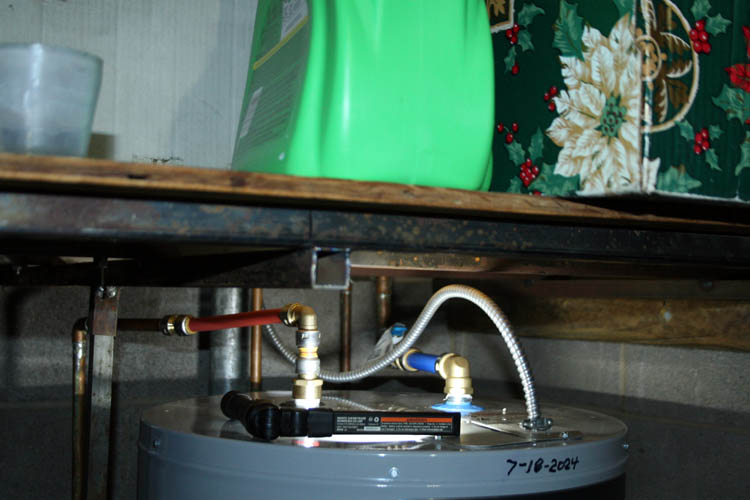
PS I have an LED light source giving some light to the
dark area.
The cold blue side PEX was about a perfect fit with the
fittings, but the red hot side PEX was not perfectly aligned, but
close enough.
Web page uploaded by Bill aka Mickey Porter on 07-18-2024 and updated
on 07-19-2024, 07-20-2024, 07-22-2024 and 07-25-2024.
LEAVING ON A
SPIRITUAL NOTE
If you do not know Jesus Christ as your Lord and Savior, please take
this moment to accept him by Faith into your Life, whereby Salvation
will be attained.
Ephesians 2:8 - 2:9 8 For by grace are ye saved through
faith; and that not of yourselves: [it is] the gift of God: 9 Not of
works, lest any man should boast.
Hebrews 11:1 “Now faith is the substance of things hoped for,
the evidence of things not seen.”
Romans 10:17 “So then faith cometh by hearing, and hearing by
the word of God.”
Open this
link about faith in the King James
Bible.
Romans 10:9 “That if thou shalt confess with thy mouth the
Lord Jesus, and shalt believe in thine heart that God hath raised him
from the dead, thou shalt be saved.”
Open this
link of Bible Verses About Salvation,
King James Version Bible (KJV).
Hebrews 4:12 “For the word of God is quick, and powerful, and
sharper than any two edged sword, piercing even to the dividing asunder
of soul and spirit, and of the joints and marrow, and is a discerner of
the thoughts and intents of the heart.”
Romans 6:23 “For the wages of sin is death; but the gift of
God is eternal life through Jesus Christ our Lord.”
Romans 3:23 “For all have sinned, and come short of the glory
of God;”
Micah 6:8 “He hath shewed thee, O man, what is good; and what
doth the LORD require of thee, but to do justly, and to love mercy, and
to walk humbly with thy God?”
Philippians 4:13 "I can do all things through Christ which
strengtheneth me."


