YARD AND HOME PROJECTS 2023This is
another catch-all page documenting some of the things done around our
home. This is more or less my personal blog since I don't do the
social network sites; e.g., Facebook, Twitter, etc.
ROOF VENTILATORS COVERED
This has been an
extremely cold winter, especially December 2022 and 14 degrees F. is
very cold around here. I decided to cover the roof ventilators to
help keep heat in the attic instead of venting it out. I am sure
there are covers available, but I improvised and used a couple black 30
gallon trash bags which should work ok.
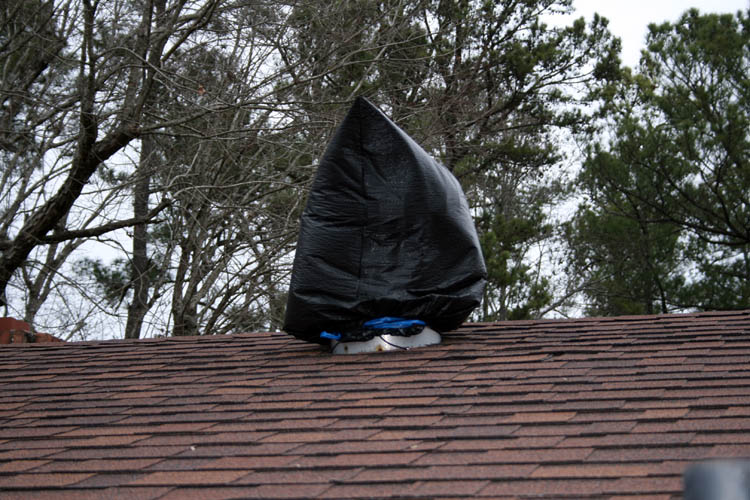
The heavy cloth water proof ventilator protectors would not doubt hold
more heat in and plan to purchase two of them.

It should be noted that the end (gable) roof vents are not closed off,
but will still allow moisture to escape.

PLACED COMMERCIAL COVERS OVER VENTILATOR TURBINES
I received the heavy duty rain proof cloth ventilator covers on
01-26-2023 and got them installed over the existing black plastic bags
that I used in a pinch.
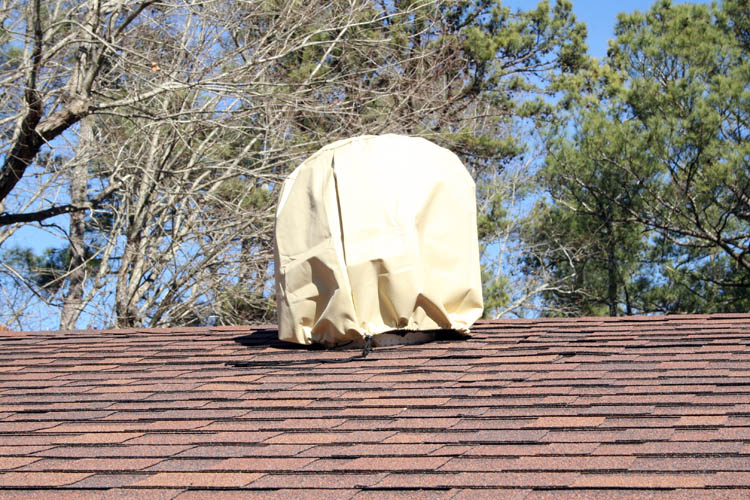
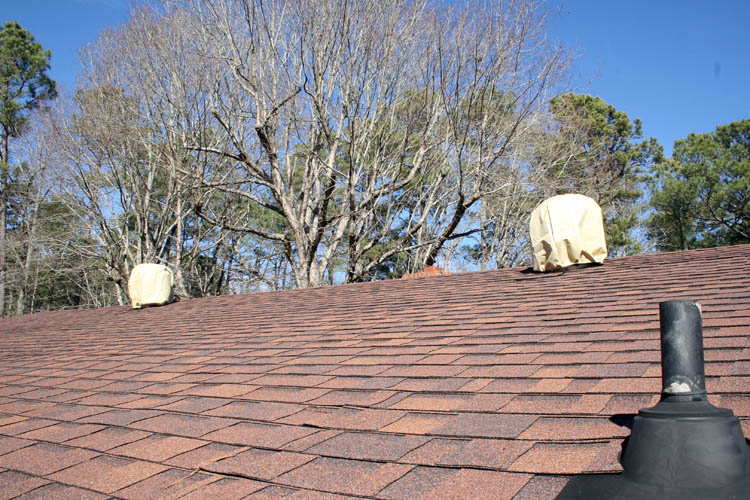

These covers should be more efficient in keeping the heat in the attic
space.
Web page updated by Bill aka Mickey Porter on 01-28-2023.
BATH TUB SPOUT WATER DIVERTER REPLACEMENT
Our bathroom was
remodeled in 2006 by yours truly
and my neighbor Johnny Hildreth (now deceased) and his son Allen who did
the plumbing. Lately the bath tub spout water
diverter was allowing too much water flow into the tub versus going into the
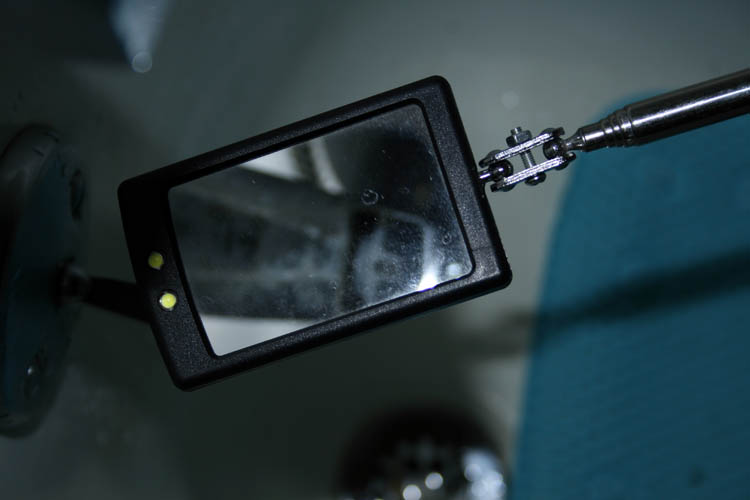
sprinkler heads. I checked with an inspection mirror to ascertain
that there was not a set screw that holds the spout tight against the 1/2
inch copper line, of which there was no set screw. The bath tub
water line going to the bath tub spout has a 1/2 inch copper soldered threaded fitting,
versus a plastic compression fitting.
I attempted to rotate the spout (counter clockwise) with a large pair of Channel Lock pliers
with cloth protector for the spout,
however it didn't budge and didn't want to risk breaking the copper line
behind the shower surround which would be a nightmare to repair.
In all probability, it would have rotated with additional torque
applied, but as stated, I didn't want to risk breaking the copper tubing
off. Currently, there is no access opening or panel on the back side of the
shower wall to allow access, however there was one on the original
construction if I am not mistaken which was covered up with tongue and groove wainscoting
during the remodeling.
I viewed videos of the bath tub spout water
diverter replacement, however no one installed the repair kit without
taking the bath tub spout out of the tub and I believed I could do it
with the usage of an inspection mirror held in place with one of my
gadgets I use to hold spoons, forks, etc. while photographing food items
for my recipe pages on this website.
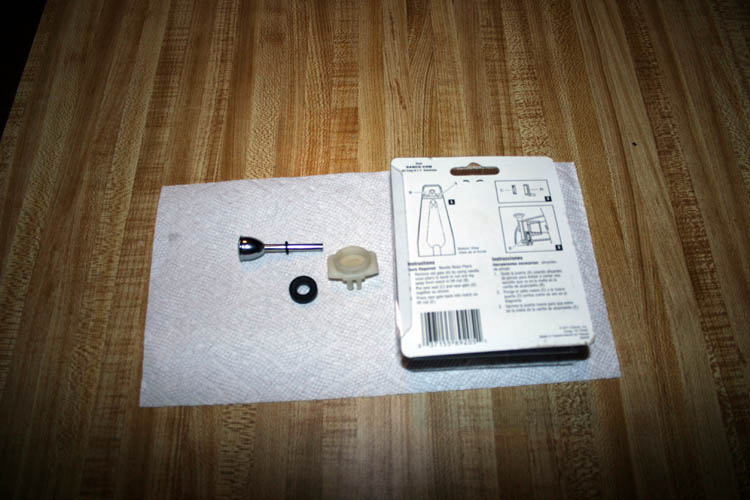
Above is the water old water diverter which shows the stem, gasket and
white plastic gate that holds the gasket in place. As stated
later, I broke the small notched tip off the stem while opening the U
shaped portion of the gate which worked ok too.
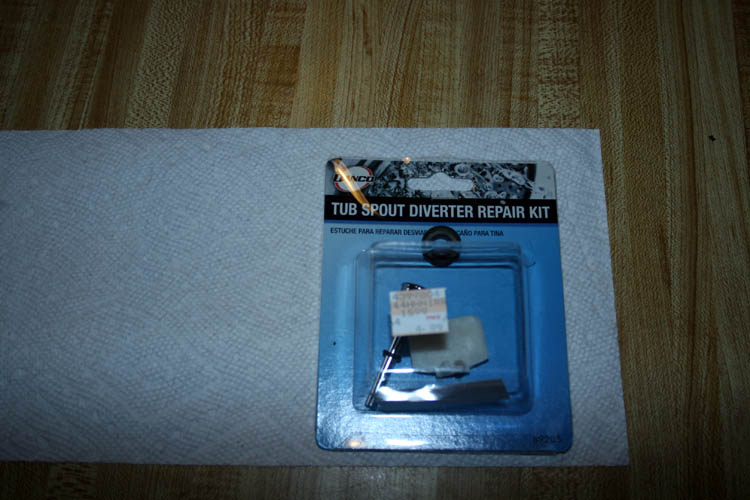
A close-up of the parts made by Danco and available from most hardware
stores. This one came from the Ace Hamlet Hardware store in
Hamlet, NC. Lowe's in Rockingham, NC had one which was supposed to
be universal, but it would not fit the Peerless model in our bath tub
and made for the Moem products.
It was challenging to get the plastic U shaped tab opened up on the
white plastic gate to allow
the stem to be removed from the plastic gate since I was having to look
into the inspection mirror and everything is reversed while using a pair
of long nose pliers to get the stem loose. I broke the end of the
stem off which worked out ok to allow the gate and gasket to be removed
from the bath tub spout housing. While the parts were out of the
water spout housing, I used a putty knife to clean any calcium water
deposits where the gate and gasket moves up and down.
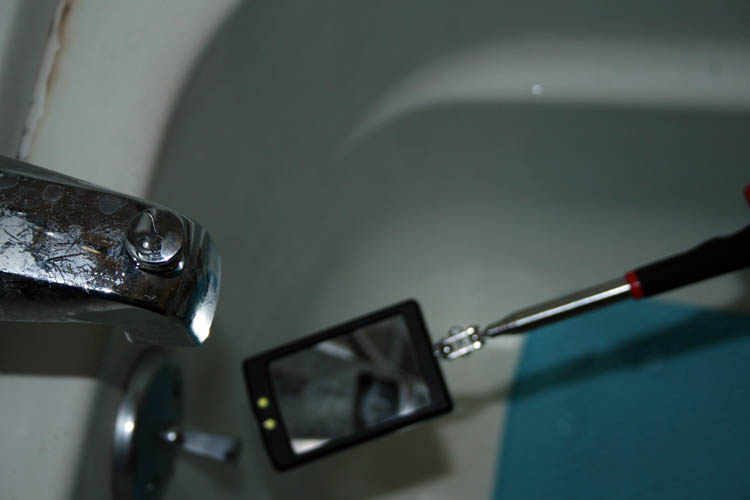
It was hard to get a good pix of the parts in the bath tub spout due to
reflection from the camera flash.

This is the best pix that I took showing the
"innards" of bath tub spout. There is
a vertical tab built into the spout housing that keeps the gate and gasket in place
which the gate moves up and down controlled by the stem with the knob.
The repair was a success and it was wonderful to get the full force of
the water pressure coming from the shower heads.
The ole saying,
"There is more than one way to skin a cat"
manifested itself in this repair
and I enjoy being able to think outside the box which many times is
certainly unorthodox to say the least and probably the correct political
terminology to use!
NOTE: I could have cut the stem
off below the knob with a pair of Lineman's pliers and the plastic gate
and gasket would have dropped out.
This coming Spring, our Lord willing of course,
I have annual maintenance to perform on two generators, lawn tractor,
weed trimmer, Troy Bilt tiller, leaf blower, chain saw, cooling and heating system along with
changing oil and filters in two vehicles every 3K miles. Also, I
have to till up the ground where our tomato patch is located and get some
fertilizer into the ground before planting time.
My White Oak
tree nicknamed
Tom Dooley, of which I hang the deer
harvested for skinning and quartering up has died and have one large
section and several long limbs I need to cut back. I tried to get
the tree removal
outfit that did the major trimming
back of the tree, but only got lies as to him coming by to check it out.
I guess the job was too small for him.
NOTE: I had Xylem Tree Experts cut
the tree back on 01-24-2023 documented
here.
TILLED THE TOMATO PATCH
On or about 02-14-2023, I fired up the ole
antiquated Troy Bilt tiller and tilled up the tomato patch area. I
plan to add fertilizer, crushed egg shells, etc., to the patch and till
it up again before tomato planting time.

Web page created by Bill aka Mickey Porter on 01-14-2023 and updated on
02-17-2023..
DRYWALL AKA SHEETROCK REPAIRS/REPLACEMENT
Prior to having our last roof on our home replaced, we experienced a
torrential rain for a few days, whereby creating a serious
leak in the main living room and a small bedroom my bride uses as a
dressing room. I was able to go into the attic and add
reinforcement between the ceiling joists in the living room and pulled
the sheetrock back into a level position. I was also able to
locate the leak in the roof and repaired it with silicone adhesive.
The sheetrock aka drywall wasn't seriously damaged, but sagged after getting wet
with the tapped and compound joint separating. Due to the
restricted height of the attic space in the small bedroom where the leak
occurred near the wall, I was not
able to find the slow leak or repair it either. Since the roof
needed replacing, it was a waiting game.
NOTE:
DRYWALL VS. SHEETROCK
Drywall is a panel made of gypsum plaster pressed between two thick
sheets of paper. It is used to make interior walls and ceilings.
Drywall construction became prevalent as a speedier alternative to
traditional lath and plaster.
Sheetrock is a trademark for drywall made by the US Gypsum company.
LIVING ROOM REPAIRS NEEDED

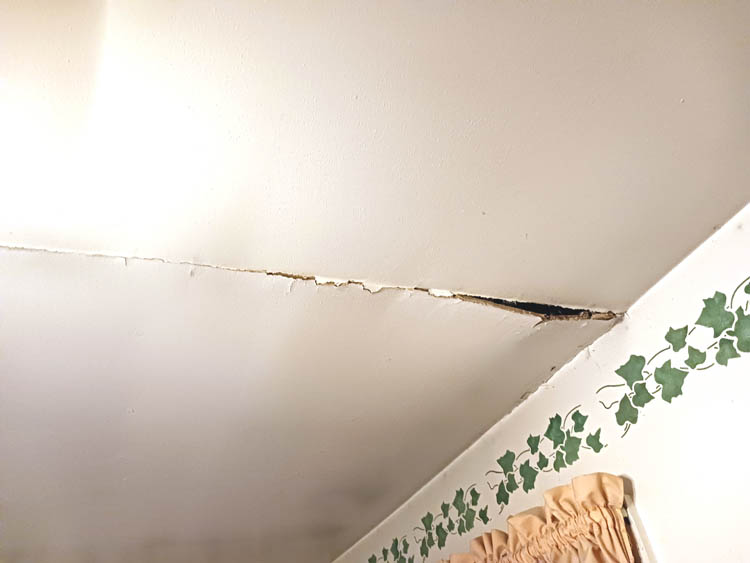
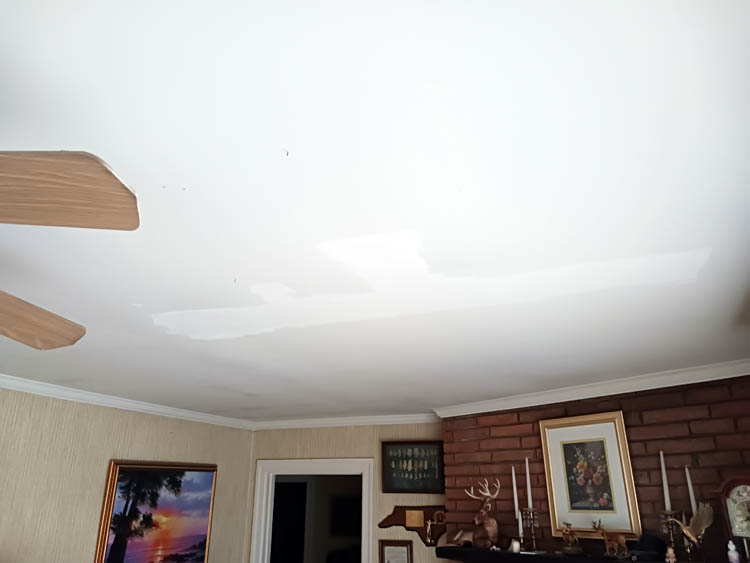
As evidenced by the above pix, this was an eye sore and I nicknamed it the
"railroad track" and
definitely needed repairing. I could not located anyone that
wanted to do this small job and never got around to it myself. I have
done drywall stuff as an amateur replacing some drywall when I remodeled
our main bathroom,
but knew this entire project might be too much for an amateur.
DRESSING ROOM REPAIRS/REPLACEMENT TO SHEETROCK
As stated earlier, water had damaged the sheetrock and it was falling
down from the joint. The tape and the compound could not hold the
weight of the 1/2 inch thick sheetrock once it was water logged/wet.
Once the new roof was installed, the slow leak stopped, but the damage
to the ceiling sheetrock took its toll.
The forward sheetrock panel is not damaged, but the rear sheet is not
repairable, but will have to be replaced.
BART BIRGO TO THE RESCUE
Our neighbors, Stephen and Connie Marsh had their pool deck replaced by
Bart Birgo of Rockingham, NC recently and I asked Bart if he did drywall
repairs and he stated he did. After he finished building another
deck for them, he came down and surveyed the repairs needed and
agreed to do the job and stated he would purchase a sheet of sheetrock
aka drywall from Lowe's in Rockingham, NC for the small dressing room
repairs.
The first thing Bart did was remove the damaged sheetrock, pix
below.
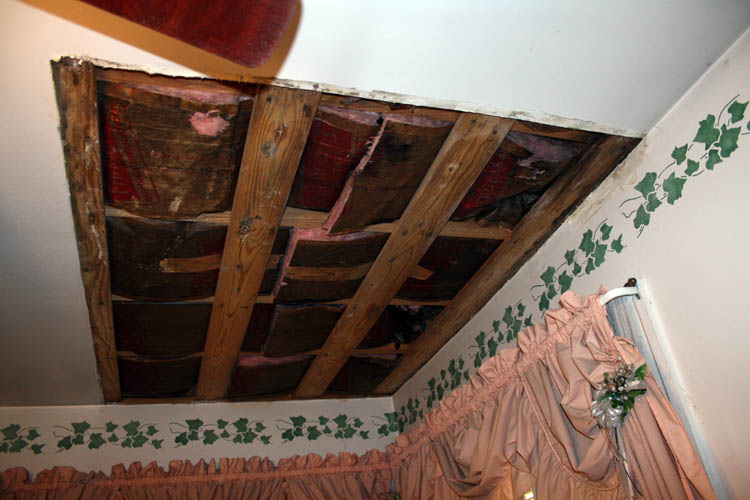
The sheetrock removed was around 4 x 6 feet and I helped hold one end while he
worked the replacement panel into place. When this home was built
in 1956, sheetrock nails were used instead of screws to secure the
drywall in place. Building technology has rapidly changed over the
decades. This home was "stick built"
meaning the rafters were put together on site without metal corner and
end plates and the cabinets
were made on site or off-site in a personal woodworking shop by the
finish carpenter.
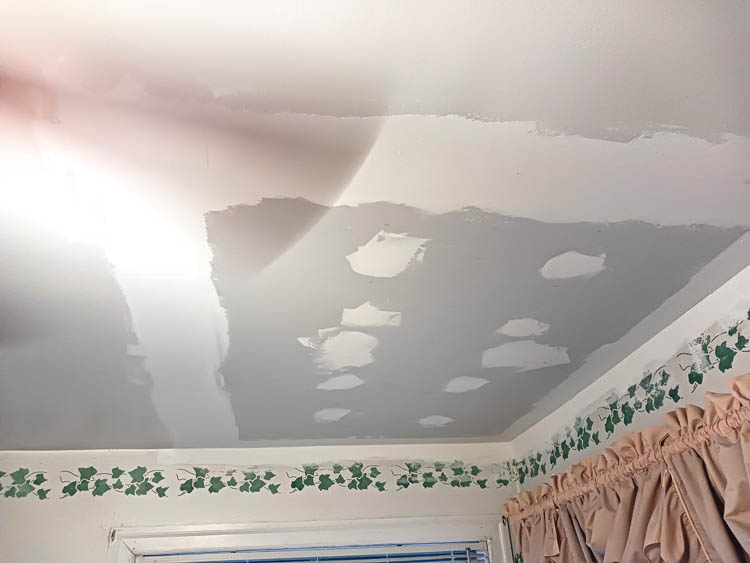
Sheetrock in place, taped and compounded ready to be sanded and painted.
Bart used Zinsser primer that I had and semi-gloss white & pastel base interior paint
manufactured by PPG Architectural Finishing Inc, that I purchased locally from H. W. Little, Inc.
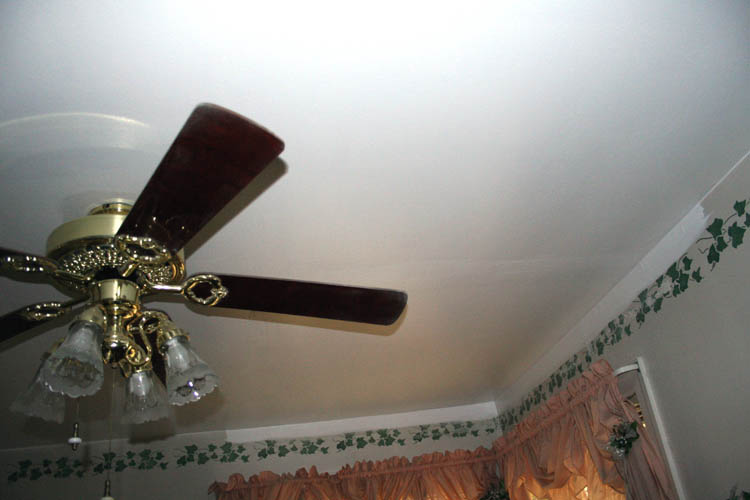
The border below the sheetrock replacement will be painted when we have
the entire room walls painted at a later date. The original
drywall compound extended several inches below where the ceiling and the
wall joints meet.
LIVING ROOM REPAIRS
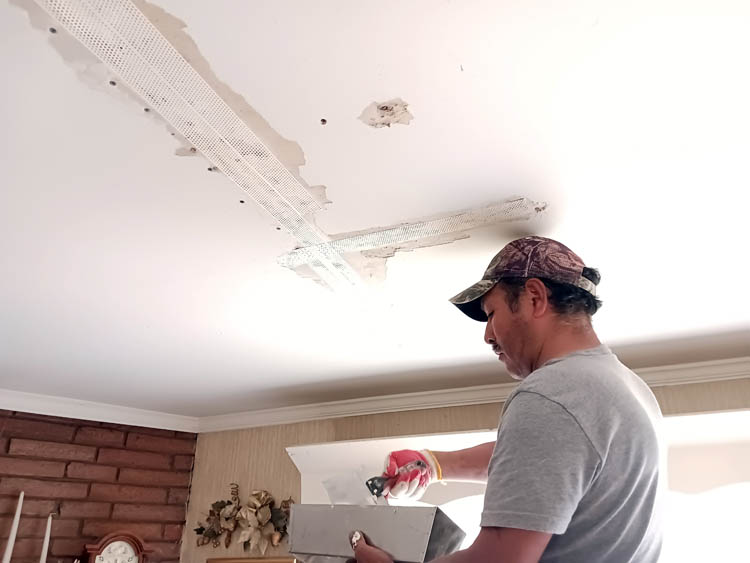
Bart removed the old drywall tape, screwed the
"railroad track" drywall screws flush, taped the seams needing repairs
using self-adhesive Easy Joint Tape and starting to apply the first
application of ProForm all-purpose joint compound.
The second coat of compound applied, dried and I believe lightly sanded
ready to paint.
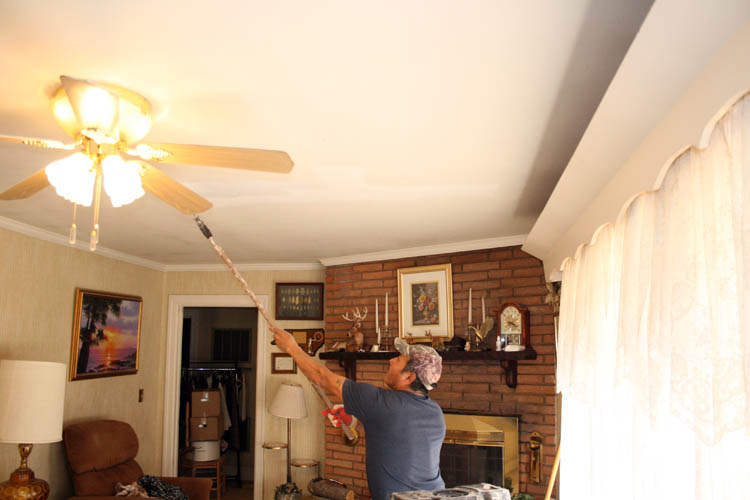
Bart primed the entire living room using a can of Zinsser primer I had
on hand which was still good. He had to work it with a paint auger
and one of his battery drills. I later gave him the auger that I
used mixing paint for our holiday outdoor decor projects, of which I no
longer build.
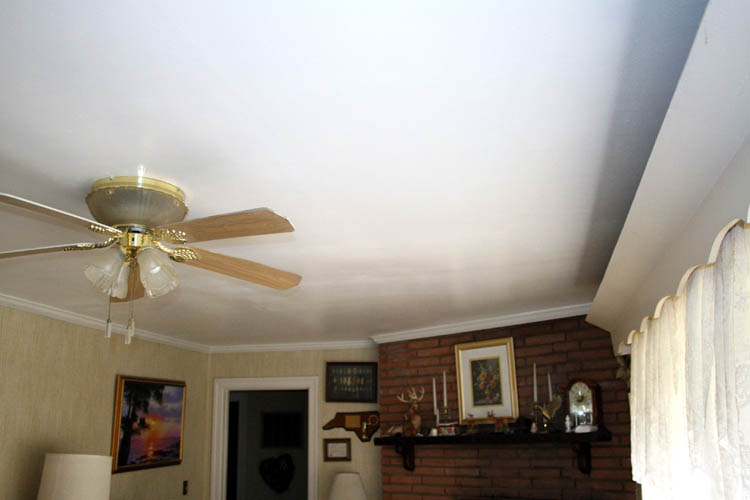
I am well pleased with the job that Bart Birgo of Rockingham, NC did.
His specialty is building decks, replacing doors and windows and highly
recommend him for the same. Bart finished this project in two (2)
days and was amazing to watch him work, basically non-stop.
We both enjoyed lunch together; the first day I made us a
Philly cheese
steak hoagie and the second day, I prepared us a
Chicken bog
with 5 Cheese toast oven baked bread.
Web page updated by Bill aka Mickey Porter on 04-01-2023.
BEDROOM OVERDUE FOR PAINTING
Our bedroom has the same "puke"
green color since we purchased our home in 1989 and it has been overdue
for decades for a new paint job.

Above is the horrible color which I don't think was the original color
when this home was built.
BEDROOM FINISHED PAINT JOB
I contracted with Robert Poplin of Lilesville, NC cell phone number
(704-475-9284) to paint the ceiling and the walls and him and his
helper Shawn Ponds of Rockingham, NC finished the job in a day plus an
hour or so and well pleased with the results. It took a couple
coats of paint on the ceiling and walls to cover the ugly green color!

The ceiling is now a flat white color and the walls are China White flat
Valspar Ultra White. I have blackout paper shades behind the
drawstring shades which keeps the room fairly dark, especially at night.
NOTE: Robert Poplin specializes in painting, however he is
a "handy man" doing carpentry
work, plumbing and decks!
SWING MAINTENANCE
I normally take our
yard swing down in the month of October
or November each year and store it in my basement woodworking shop to
dry out. I will then bring it out in Spring, clean it with mineral
spirits and after a day or two of drying, will spray a coat of oil based
stain onto it to keep it going.
The weather finally got dry enough with a low humidity level on April
24, 2023 and applied a good coat of stain to said swing.

Today is April 28, 2023 and it has been raining off an on since the 25th
and have not put the swing back up in the front yard, but will do so
very soon. I enjoy going out of the morning with a fresh cup of
Java aka Ole Joe and put the swing to good use. It is also a good
time to mediate on the goodness of God through our Lord Jesus Christ and
thank Him for another day that He allows!
Web page updated by Bill aka Mickey Porter on 04-01-2023 and 04-28-2023.
SPRAYER IN ACTION
The weather was extremely nice on May 6, 2023 and got the sprayer out
again and sprayed for ants and termites. I used the sprayer
several days ago to apply weed killer for the clover patches in the
yard, mostly the back yard. I then sprayed Roundup around the
lower milky quartz wall and drainage ditch.
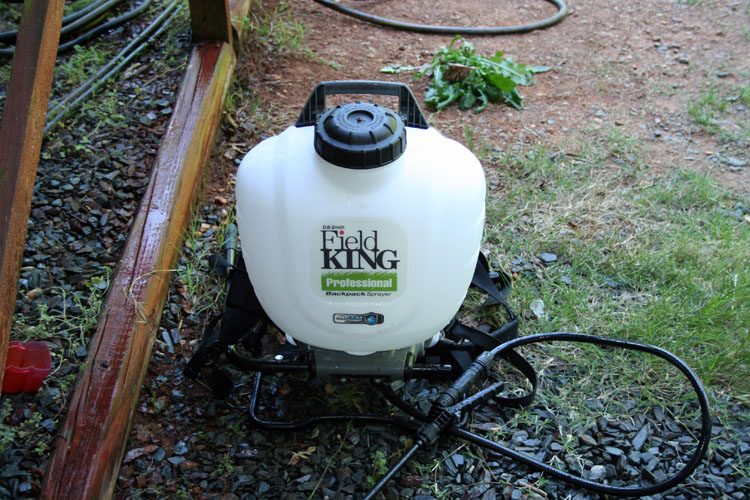
So far, I have experienced excellent results with the performance of this
Field King sprayer.
My next project will be the planting of tomato plants and hopefully no
more cold weather in the high 30s which we had a few days ago.
Also, I need to remove the roof ventilator covers and paint the North
side gable facer boards of our home..
Web page updated by Bill aka Mickey Porter on 05-06-2023.
TOMATO PLANTS IN THE GROUND
I waited too late this season to purchase the three (3) gallon and one
(1) gallon size tomato plants since Ace Hardware in Hamlet, NC was sold
out and only had one (1) one gallon plant in stock, therefore I had to
purchase much smaller plants on 05-10-2023. Also, there were no
cherry tomato plants available either. I planted thirty seven (37)
tomato plants today being 05-11-2023.

After getting the tomato plants in the ground and watering them, I took
a time out and parked myself in our yard swing enjoying mother nature
and all that God has created!
Now is a waiting game for some home grown tomatoes. There is a man
in Lilesville, NC that usually has early slicing tomatoes for sale and
will check on his tomatoes in a week or two.
My bride of fifty-five (55) years cautioned me about waiting so late to
purchase tomato plants and my bad for sure! She has far more
common sense than myself in such matters.
There are several pending projects to complete; staining the wheelchair
ramp and painting the North end of our home gable/fascia. The
South end paint is still holding up well.
The transplanted tomato plants have livened up some since a couple good
watering yesterday.
Web page updated by Bill aka Mickey Porter on 05-11-2023.
TOMATO PATCH UPDATE
It has been over a month since the tomato patch was planted and here a
few pixs taken on 06-19-2023:

The above tomatoes are on the one gallon size plant and two of them are
ready to harvest. I plan to make my bride a club sandwich with one
of them either today or tomorrow.

There are several of the smaller tomato plants that are bearing tomatoes
and it will probably be the end of next month before they have matured
and ready to harvest.

As evidenced by the above pix, the plants are growing and we will have a
late harvest for sure, our Lord willing of course.
Web page updated by Bill aka Mickey Porter on 06-19-2023.
TOMATO PATCH UPDATE

There are plenty of green tomatoes on the plants and should be ripened
by the middle of next month for sure!

This was the one gallon size plant, all the others were very, very small
plants.


Click on above thumbnail pixs for a larger screen view.
Web page updated by Bill aka Mickey Porter on 07-15-2023.
A FEW MORE TOMATOES

The tomatoes are beginning to ripen; the top row tomatoes are left:
Pink Brandywine and the other three are Cherokee Purple. The
second and third row are Celebrity if I am not mistaken.
I need to spray some Sevin Insect Killer on the tomato plants and
tomatoes.
Web page updated by Bill aka Mickey Porter on 07-22-2023.
MORE TOMATOES

Several varieties of home grown tomatoes; e.g., Cherokee Purple, Pink
Brandywine, Celebrity, Big or Better Boy and another one, but don't
remember the name.
Some "beautimous" sandwiches
will be derived from these tomatoes and a salad or two! Will give
some Lisa Gonzales and Wink and Rachel Myers.
Web page updated by Bill aka Mickey Porter on 08-03-2023.
SMALLER PROJECTS FINISHED
The weather was fairly cool this morning and removed the covers from the
roof turbines. While on the roof, I cleaned the gutters of leaves
and debris and should be good until late fall of the year when leaves
start accumulating again.
Web page updated by Bill aka Mickey Porter on 05-12-2023.
POWER WASHER - ELECTRIC
I have needed a power washer for a long time and finally decided to
purchase one. I didn't want to purchase a gas powered one because I
have enough gas powered small engines to keep running, although the gas
powered power washers are more efficient. Since I will not be
using a power washer, but for a few times a year, I decided to go with
an electric powered one.
There are plenty of reviews, however most of the time I am a
"Doubting
Thomas" since some sellers post their own reviews in order to
enhance the sell of more
products.
As to what one purchases, how deep your pockets are will determine how
much money you will outlay and if one is used for home usage and/or
business related.
I decided on a Greenworks Pro 3000 PSI unit, however actual
reviews with a pressure gage in line shows the Greenworks Pro 3000 PSI is overrated
as far as the PSI claimed and was around 2700 PSI if I am
not mistaken.
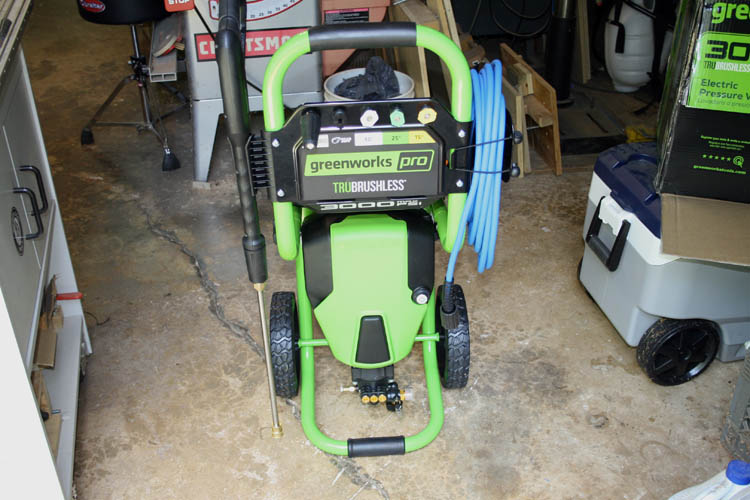
I replaced the standard hose that came with the Greenworks pro with a
Uberflex 50' instead of the 25' hose. I also added quick
disconnect fittings for the pressure hose, water supply inlet and the
standard wan. The swivel gun came with a quick disconnect fitting.
Since my first project was to power wash our vehicles, I purchased some
accessories just for that purpose.
ACCESSORIES
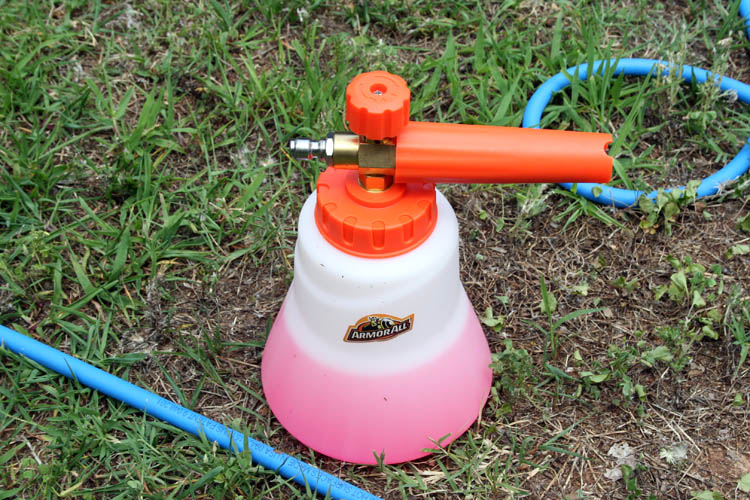
Above is an Armor All foam canon and works very well. Not the most
expensive or cheapest, but an above mid-range price.

A couple five (5) gallon buckets and plastic inserts to allow dirt and
grime to be removed from the Chemical Guys microfiber noodle mitt.
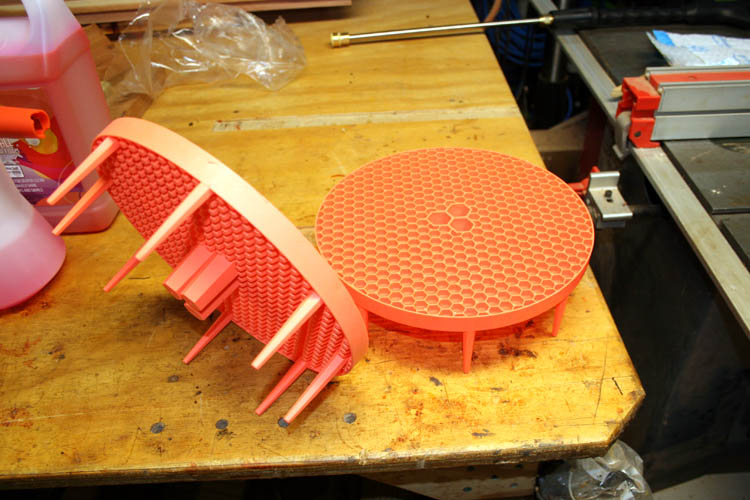
Dirt and grime will settle to the bottom of the bucket and not stay on
the microfiber noodle mitt when rinsing it out.
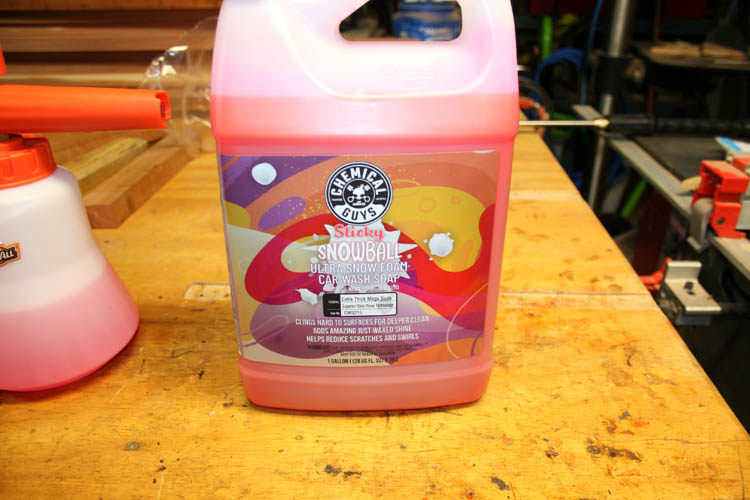
Chemical Guys sticky snowball car wash soap which works well. They
recommend using 8 oz. and fill the 32 oz. container the rest of the way with
water. You could pressure wash a couple vehicles by the amount of
solution left in the container.

Pix of McKillons swivel gun which is much easier to handle than the
standard longer wan that comes with the Greenworks pro and this gun is
ideal for vehicle washing. The foam canon would be very awkward to
have on the end of the standard wan.
I will use the long wan with a couple extensions when I wash the front
gutters and gable ends of our home.
I need to power wash the Troy Bilt tiller and get some of the grease and
grime off it.
CAR WASHING
After getting everything set up, the first order of business was to
rinse the area of the car before applying the foam.
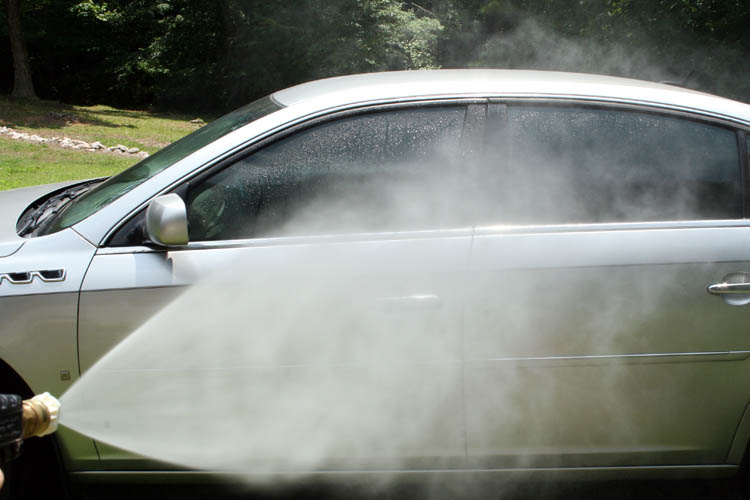
I used the 40 degree nozzle to wet the car down.
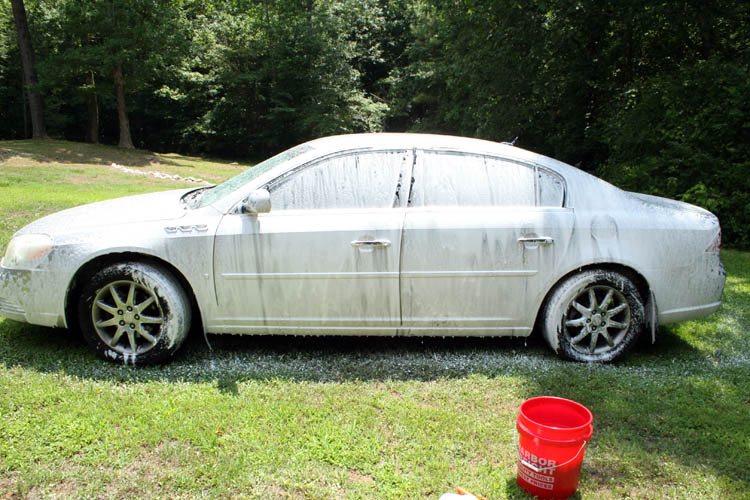
I removed the 40 degree nozzle and attached the foam canon. It
took a couple tries to get the amount of foam desired and also the
pattern or coverage desired. I took a quick pix before I got the
maximum amount of foam dispensed.
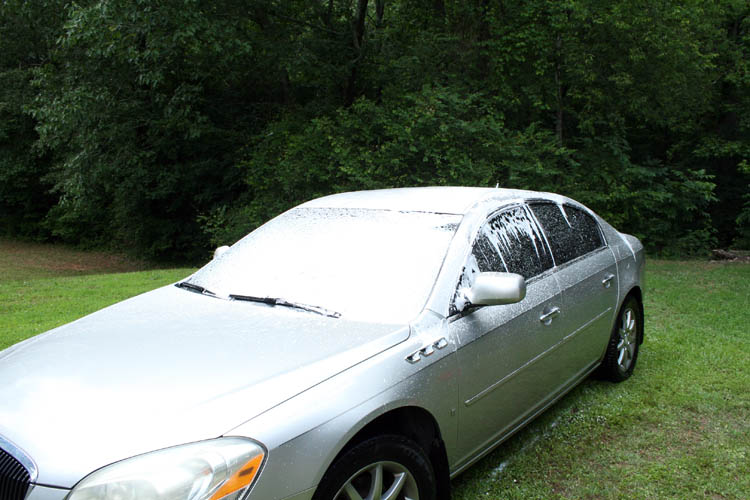
As evidenced, the Armor All foam canon applies plenty of foam to start
cutting the dirt and grime from the vehicle. Next order of
business was to use the Chemical Guys microfiber noodle mitt to aid in removing the dirt and grime.
The mitt was then rinsed out in the five gallon bucket that has the
plastic insert to help remove dirt and grime from the mitt. The
area just foamed was then rinsed off. This is where the quick
disconnects come in handy.
The Greenworks Pro power washer worked OK, but it definitely
isn't
continuous duty as you have to give it time to build back up to maximum
pressure after a minute of usage. I didn't time the procedure, but
will next time I use the power washer on my vehicle. As I have stated many, many times,
"most of the time, you get what you pay for"
however, this pressure washer is far above the mid-range price for
similar pressure electric power washers.
When you depress the start button, there is a delay and it sounds like a
jet engine revving up.
I plan to add a 40 degree nozzle with a 3.5 mm orifice to reduce the
water pressure and increase the water flow; e.g., GPM, gallons per
minute to avoid damaging the vehicle paint by using too much water
pressure. The distance from your vehicle to the pressure washer
nozzle is very important when using high pressure.
DO NOT PURCHASE THIS PRODUCT
In
conclusion, I personally would not recommend this Greenworks
Pro 3000, and believe the reviews and ratings are over rated for sure!
Web page updated by Bill aka Mickey Porter on 06-16-2023.
ANOTHER PINE TREE DYING
It seems like every 5 to 7 years or so, one of the large pine trees on
our property will
disease and die, requiring it to be cut
down to prevent a potential accident. A couple days ago, I noticed
one of our large pine trees, the top limbs had turned brown. Upon
further investigation, it was observed there were large deposits on
white sap in many places on the mature pine tree, from ground level up
six or eight feet. I did not detect any lightening strike on the
tree, therefore insects were the culprit.
When I cut the tree down, I will cut into the sections where the sap is
oozing out and try and locate the culprit and identify what species it
is.

I will pull a tape around the base of the tree and get the circumference
and the diameter and count the growth rings for an age estimate.
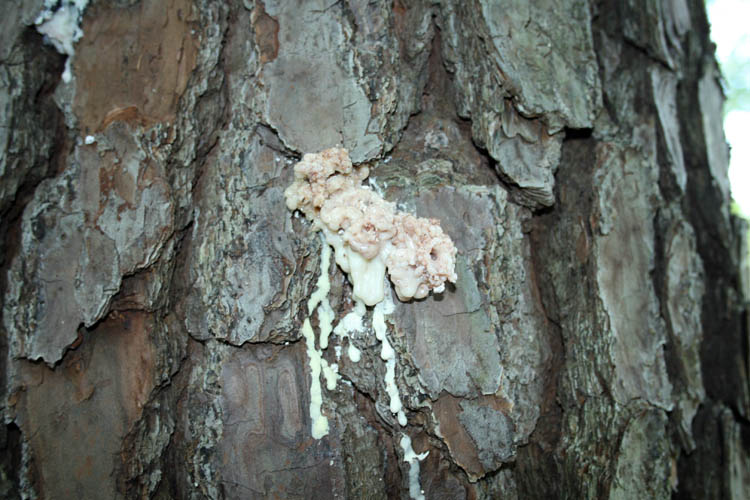
That is a large amount of sap leakage for sure.

The tree is not too far from the end of our tomato patch and the lean
should be in a direction away from the tomato patch, but will err on the
side of caution and wait until the tomatoes are finished, but think that
is wishful thinking on my part.
I will not doubt cut it down in the near future after surveying the
scene a few times.
Web page updated by Bill aka Mickey Porter on 06-28-2023.
CUT THE TREE DOWN
I was antsy this afternoon and looked at the dying pine tree again and
was confident I could fall the tree in the direction needed, therefore I
got the Husqvarna model 55 chainsaw out, gassed and oiled it up.
However, my first cut for the removal of the wedge, the chain was too
dull. I then replaced the chainsaw chain with one recently
sharpened and tried again. It cut fairly well, but was not leaving
the desired chips. I believe the raker teeth on the chain is too
high, inhibiting the chain cutting teeth to fully engage the tree.
I could not locate the device to check the raker teeth earlier when I
sharpened the chain and will have to get a new tool.
The pine tree was much larger in diameter than the length of bar on this
chainsaw which is eighteen (18) inches and presented a little problem
trying to work around the tree, but finally did so.
The tree fell in the direction of the wedge cut and the hinge steered it
in that direction. However, my chainsaw cutting skills is lacking
due to not using one enough; only a time or two a year. I usually
don't make a parallel cut, but it is at an angle as evidenced by the
pixs below. Normally this is an indication of an improperly
sharpened chain, but the electric sharpened does a good job.


I did cut a portion of the log in two, but the chainsaw chain was not
cutting properly and stopped.
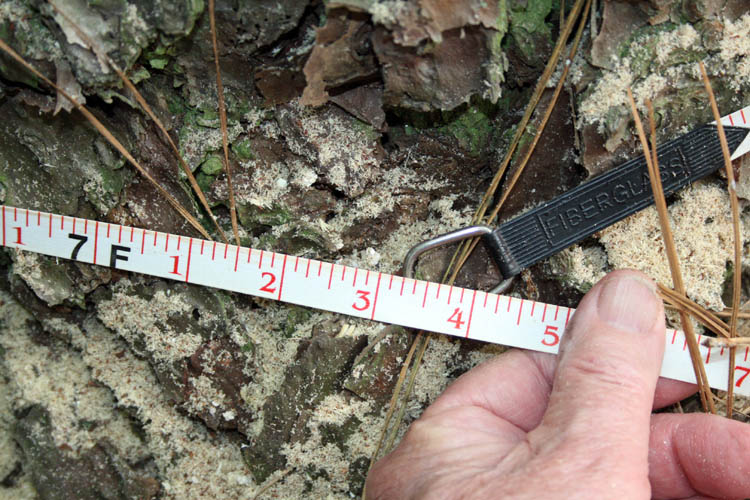
I was a few inches from the ground with the above survivors tape.
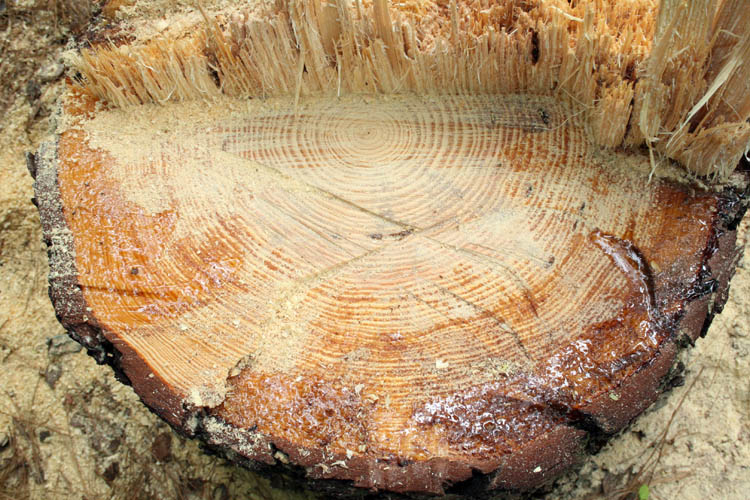
The above tree was approximately 94 feet in length and 28 inches in
diameter and if I counted the annual hard growth rings, it is about
fifty (50) years old too.
STUMPED THE TREE BASE

The Husky model 55 chainsaw got a workout cutting the stump. As
stated earlier, my chainsaw cutting skills are definitely lacking!
The good news if any on losing this mature pine tree to insects; it will
allow more sunlight into our small tomato patch.
I will cut it into manageable lengths when the weather cools down and
let nature take its course to render it back to nature which will take
several decades for sure.
Web page updated by Bill aka Mickey Porter on 06-29-2023 and 07-03-2023.
STAINED WHEELCHAIR RAMP
I had about 7/8 of a gallon of redwood oil type based
stain TWP 100 from SealandProtect.com left over from staining
our yard swing back in the spring and decided to use it to stain our
wheelchair ramp on 08-02-2023. I used a roller to apply the stain
and a small sponge type brush for some detail work. However, I
needed about one pint to one quart to finish some of the trim work on
the ramp.
NOTE: Do not order from SealandProtect.com, they are no
longer a TWP dealer.
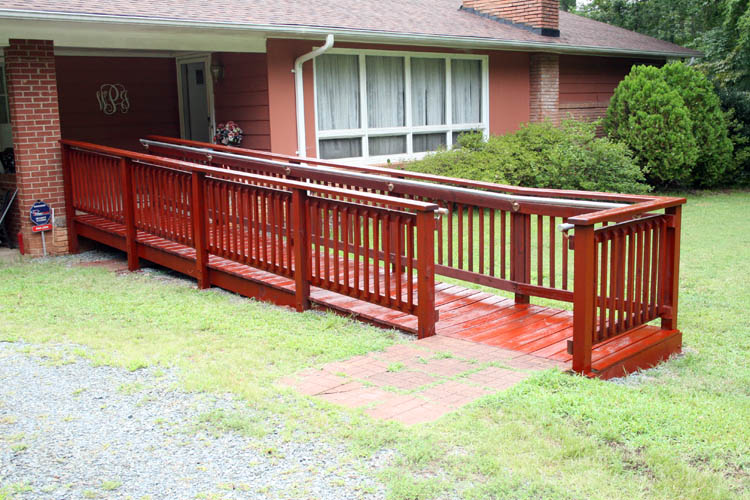
Rain is forecast for the afternoon of 08-03-2023, but with the hot
weather the stain penetrated the treated and prior stained wood just
fine.
The wheelchair ramp was stained sometime around August 23, 2021 and has
held up very well. The current treated wood cracks badly and
treated wood is definitely not as good as it was 30 years or more ago
due to having to change the chemicals used due to EPA
regulations!
I plan to order a 5 gallon pail of the redwood oil based
stain TWP 102-5 from SealandProtect.com and stain our deck, but will use the 2.5 gallon pressurized tank
and my CAT technologies spray gun for that job.
NOTE: SealandProtect.com is no longer a dealer for TWP
products and their phone lines are out of service. I had to get my
credit card company to issue a refund for the above order.
I plan to order said stain from
world of
stains who is a dealer for
TWP products..
Web page updated by Bill aka Mickey Porter on 08-03-2023.
REMOVED TWO DYING DOGWOOD TREES
For the past few years, we have two dogwood trees adjacent a drainage
ditch in our back/side yard that are diseased and each year have to cut
back the dead/dying limbs, of which the trees needed to be removed.
The morning of 09-11-2023 was fairly cool and got the antiquated
Husqvarna farm model 55 chainsaw out and cut them down. I didn't take
any pixs of the before and after and that is my bad!
However, there is a pix of one of them on this page where I took a pix
of the tomato patch.

A few days earlier, I removed the last of the tomato plants, stakes and
cages and we certainly will miss those fresh home grown tomatoes.
I having two pending projects being 1) stain our deck and 2) paint the
south end of our home, eve and gable area. This afternoon if the
weather permits, plan to cut our grass, our Lord willing of course.
Web page updated by Bill aka Mickey Porter on 09-12-2023.
MURPHY'S LAW NEVER SLEEPS
Today is September 15, 2023 and finally got around to staining our deck.
After getting out the 2.5 gallon pressurized paint tank and getting it
hooked to the air supply to test it before putting a fresh liner in the
tank and adding the TWP redwood oil based stain, I noticed two air leaks
from one of the air hoses that I have attached under the deck that leads
to the car port where there is probably another 50 feet of air hose,
used to check the air pressure on tires and for spraying our wheelchair
ramp.
My High School English teacher would be not be please with the above two
sentence paragraph; grin if you must!
I got in a semi-panic mode, but had enough spare air hose with that one
section removed to get the job done. In the mean time, I misplaced
my spray gun and took about 5 to 10 minutes to locate it, of which I had
it in my hand when I removed the bad section of air hose and placed the
spray gun on a window ledge underneath the deck.
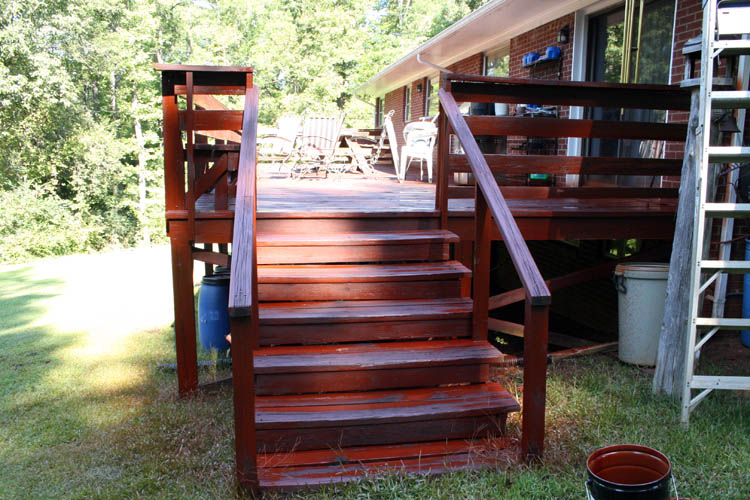
Pix of the finished job. I sprayed one end and moved the table,
chairs and grills onto the area just sprayed and finished the job.
It took nearly the entire 5 gallons of stain to get all the deck area sans
the outside posts and supports.
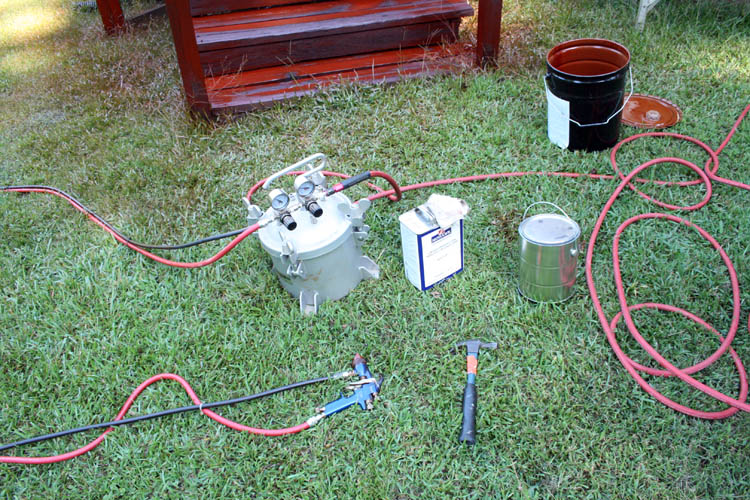
In the above pix, I am getting ready to remove the top from the tank and
liner. I then used lacquer thinner to flush out the 25 feet of
fluid line. Murphy's Law was still awake and could not get the
tank to pressure seal to spray lacquer thinner through the fluid hose.
The seal was twisted and had to straighten it out and they everything
was ok!
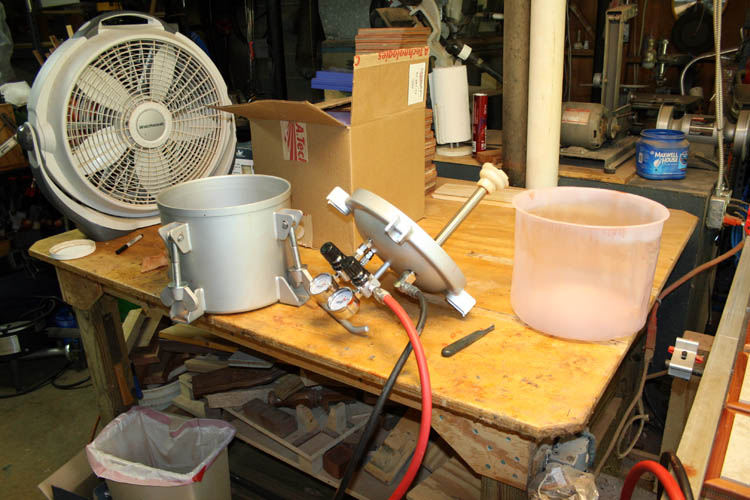
The equipment clean-up is definitely a job, but is necessary to keep the
spray equipment operating at peak performance. I am soaking several parts of the spray
gun in thinner also. It took a couple hours or more to
complete this project and a good portion was moving the deck items and
of course the clean-up of the system.
I have one major project left and that is to paint the south end of the
eve and gable of our home. I had the entire trim work painted
about 7 or 8 years ago, but the water based exterior paint the
contractor used has about run its course, therefore going to use oil
based enamel paint which works fine over latex paint.
I already power washed the area down and added two 5 feet extensions to
the power washer wan and it was a "dawg"
to control.
Web page updated by Bill aka Mickey Porter on 09-15-2023.
USING PAINT BRUSH AND ROLLER.
I have been watching the weather prophets trying to get a couple days of
some good dry weather and went to Lowe's in Rockingham, NC on 09-20-2023
and purchased a couple gallons of oil based enamel white gloss paint, a
couple Mohair 9 inch rollers and wanted to get some boiled linseed oil,
but they were out. I had some mineral spirits on hand for clean-up
and also would work in a pinch if I needed to thin the paint some, of
which I didn't need to do so.
I knew it was going to be a serious job because I needed to use my
Little Giant ladder
in the A-Frame configuration and also the 24 feet extension ladder at
the highest point of the roof, although I extended it out only a couple
or three rungs. I also got the stand-offs installed on the 24 feet
ladder and only needed to have them out about eighteen (18) inches since
the overhang is less than two feet.
I had a good Wooster 3 inch wide natural hair bristle brush (China
White) which applies enamel paints very well.
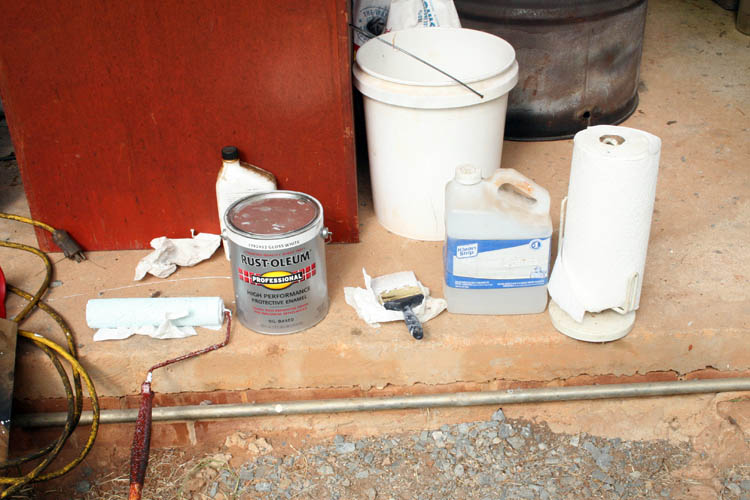
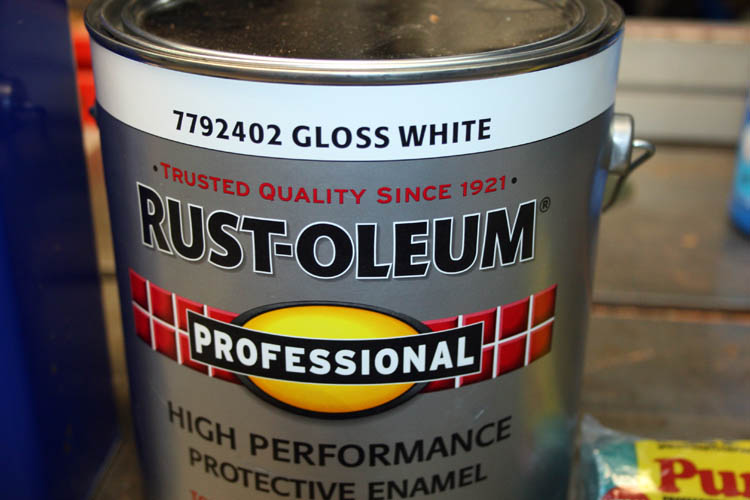

A few items used for this project. My pole for the paint roller
was way too short and had to use the small A-Frame step ladder often.
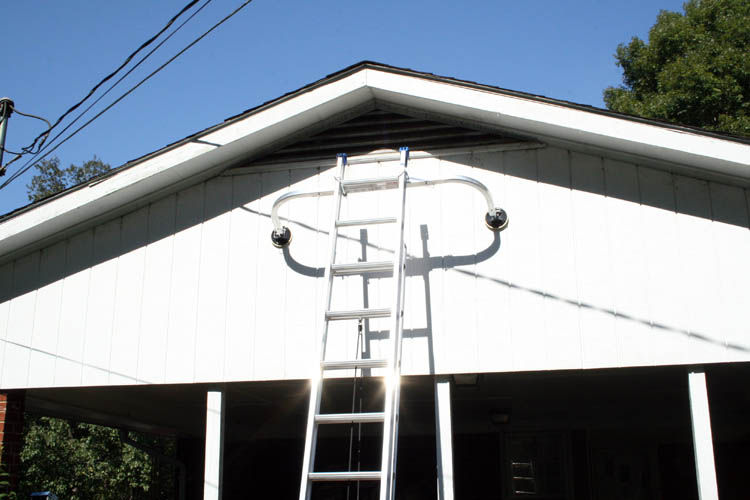
Pix of the Werner 24 feet extension ladder with the stand-offs in
position. I moved it at least two times to the right and two times
to the left. It would have been easier to use a roller and paint
tray, but the paint tray I had would not adapt to the ladder, therefore
the paint brush worked OK. I emptied half of a gallon of
the paint into a new clean one gallon paint can and used a short cord to
attach the paint can to the upper ladder vertical support member.
I painted over the worst section (frieze boards) two times and it looked pretty good for
an amateur with a paint brush and ladder, grin if you must.
The frieze boards are the uppermost boards above the soffit vent which
has mesh wire over it to keep the pesky bats out. Originally,
there was thin screen wire on the backside of the soffit, but over the
years it had rusted out in places where bats were sleeping on the ledges
of the soffit and guess their body heat caused the rust out places,
therefore 1/4 inch galvanized mess wire was added to the outside to
prevent the bats from sleeping on the ledge boards of the soffit. The gable which
is the A shaped side wall of the home that forms the peak of the roof
was painted using the Mohair 9 inch length roller and paint roller tray.
Yes, I did some praying to our Lord before and during this project to
keep me safe, because ladders will cause serious injury and death.
Murphy's Law
never sleeps!
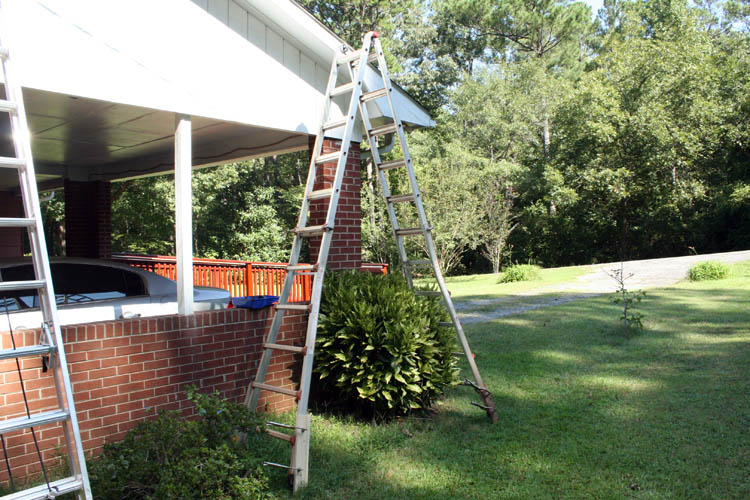
Above pix of the Wing Little Giant ladder in the A-Frame configuration.
Notice I have some pieces of wood with four (4) clamps (Erwin SP-11) used as a
leveling device for the ladder since the ground is tapered aka sloped
from the carport exterior brick wall. That Wing Little Giant
ladder is a monster for sure weighing at least fifty-two (52) pounds.
Might not seem much for the younger folks, but for an 77 year old senior
citizen, that is a good amount to move around.
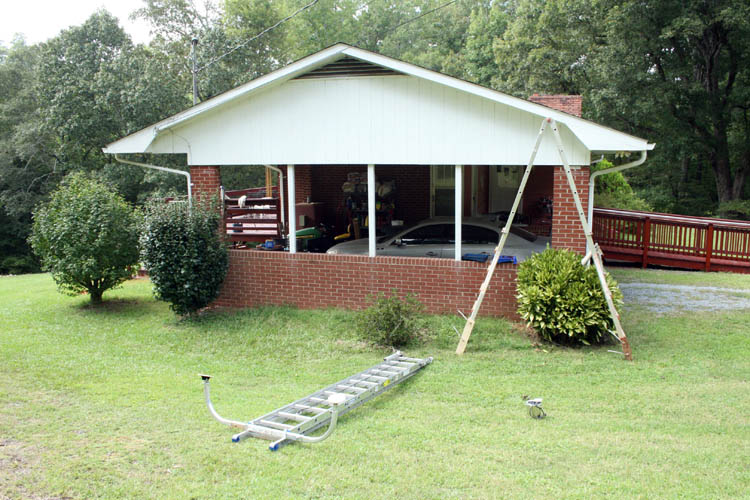
The job is progressing along very well. I used three different
ladders for this job! There was a problem working around the bush
and tree adjacent the carport when getting the A-Frame ladders into
position.
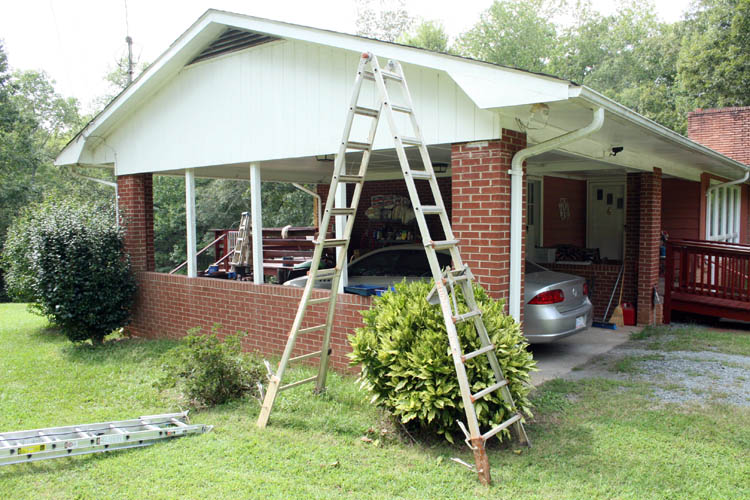
Standing on the third rung from the top of the A-Frame ladder, you have
a good 12 feet reach, but didn't need to go that high. Painting
the eaves aka the overhanging portion of the exterior wall was a little
tricky because it was difficult to get into position where I could see
what I was doing.
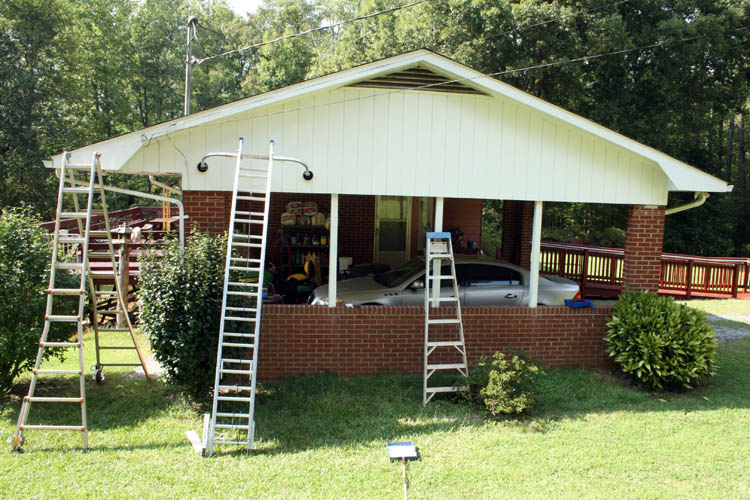
The ladder with the stand-offs is not being used, but there out
of the way trying to keep from pulling down the cable vision cable.
CLEAN-UP
I used mineral spirits to clean up the paint brush including getting paint
off yours truly! I did not keep the plastic paint roller tray, not
worth the trouble and the tray is around 3 bucks or trying to clean the
Mohair paint roller which was a little pricy.
The China White bristle Wooster brush is soaking in the mineral spirits as I
type and will finish cleaning it tomorrow, our Lord willing of course.
Only container I had to soak the 3 inch wide Wooster China White bristle
brush was a plastic coffee container, of which is way too large and you
waste a good amount of mineral spirits. After cleaning the brush,
I was able to recycle a good amount of the mineral spirits and left the
dregs in the container for disposal later.
I noticed that a square orange juice plastic container would be ideal
for cleaning the 3 inch wide brush without having to use an excessive
amount of mineral spirits; yes I can be frugal at times!
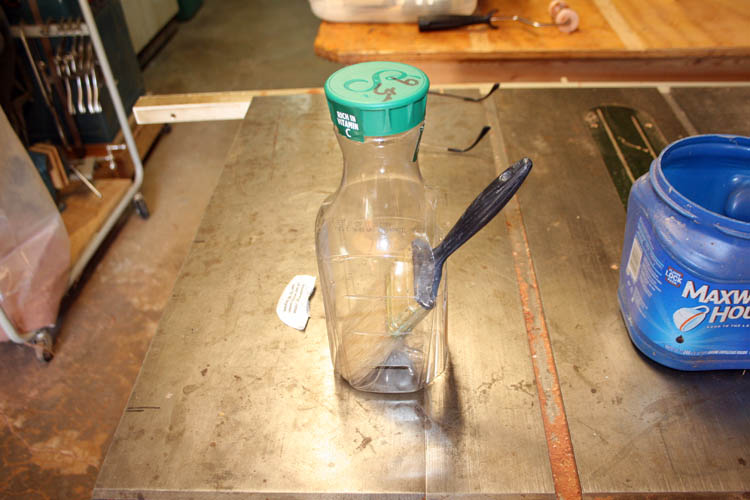
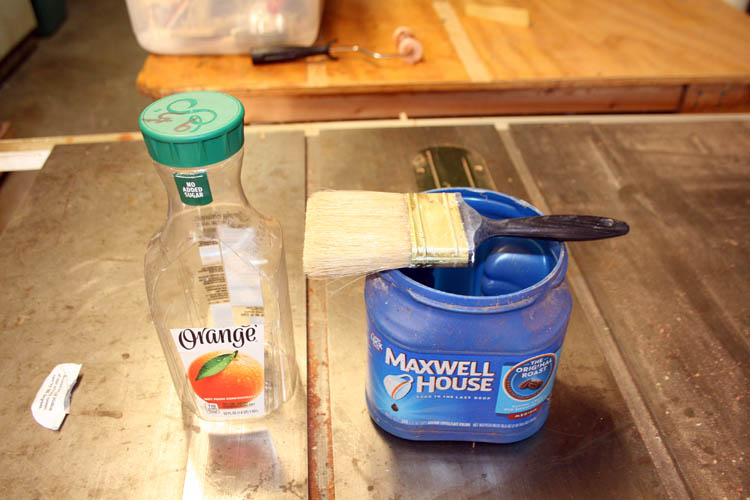
The Simply Orange juice container works perfect!
After dragging the Wing Little Giant ladder back to its storage position
and also the Warner 24 feet extension ladder after removing the
stand-offs and other equipment, it was time for a shave and shower and
kick back before "supper."
Again, I thank God through Jesus Christ our Lord and Savior for my
personal safety and protection for this project!
Web page updated by Bill aka Mickey Porter on 09-21-2023 and 09-29-2023.
POWER WASHED NORTH END OF HOME
I decided to power wash the north end of our home and will probably give
it a coat of oil based exterior enamel paint when the weather permits.
It has not weathered as much as the south end of our home due to being
in the shade most of the day.
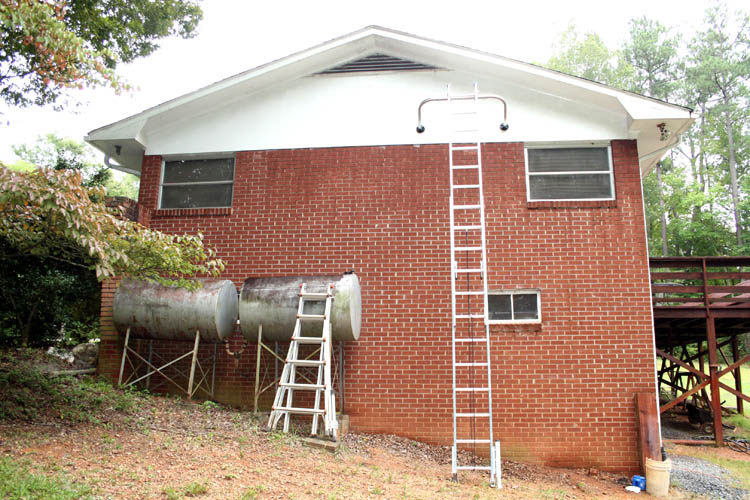
After power washing, I believe the paint would be good for a few more
years, but will probably paint it, never the less.

After using the Greenworks Pro 3000 PSI unit the second time on
our home exterior, about the only thing it is good for is power washing
vehicles in my humble opinion. It doesn't remove dirt and grime
without a lot of effort having to go over the same area a time or two.
As stated earlier on this page, it wasn't the cheapest electric power
washer by far. Seems like I have to learn the hard way many times,
but this is a part of life!
I am definitely not comfortable on a ladder that is about twenty (20)
feet or more extended and many decades ago, it was not uncommon to climb
a tree and get 30 to 40 off the ground using my own manufactured US
Patented foot climber tree stand; US Patents 4,953,662 and
5,167,298, but the date on my birth certificate has finally got
caught up with me, grin if you must!
Web page updated by Bill aka Mickey Porter on 09-26-2023.
PAINT ROLLER TRAY HOLDER
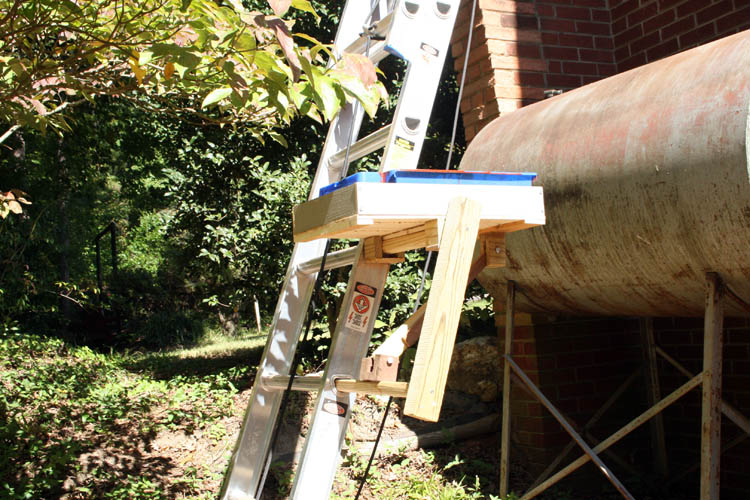
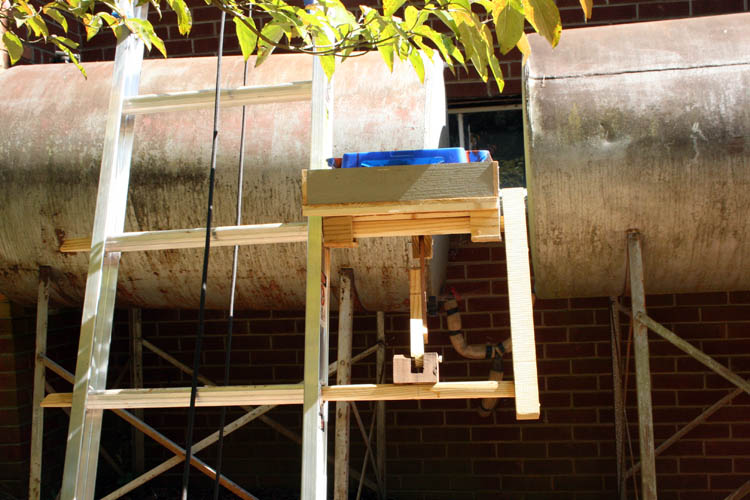
REASON FOR THE PAINT TRAY HOLDER
What painting I have done using a ladder and
paint roller tray has been
awkward to say the least with no efficiency whatsoever!
I went on line and viewed several different products available for usage
on a standard step ladder and extension ladder and did find one called
the Ladder Companion and ordered one. The product was designed
more for holding tools and accessories than holding a paint roller tray. However, the seller has been
extremely slow to deliver said product and needed one for the first week
in October while the weather is still conducive for painting.
Also, the seller had a couple complaints on file with the BBB for
delivery issues. I sent the seller an email and made a couple telephone calls and got
voice mail and never got a reply. Therefore, I decided to build one (impromptu) out of
scrap aka unallocated wood and make it as
light as possible and still be sturdy enough to hold a gallon of paint
and large enough to hold a paint roller tray.
If I don't get the product ordered in a couple weeks, I will have my
credit card company get me a refund.
I plan to give this a test run when I paint the North end of our home.
Web page updated by Bill aka Mickey Porter on 10-04-2023.
PAINTED NORTH END OF OUR HOME
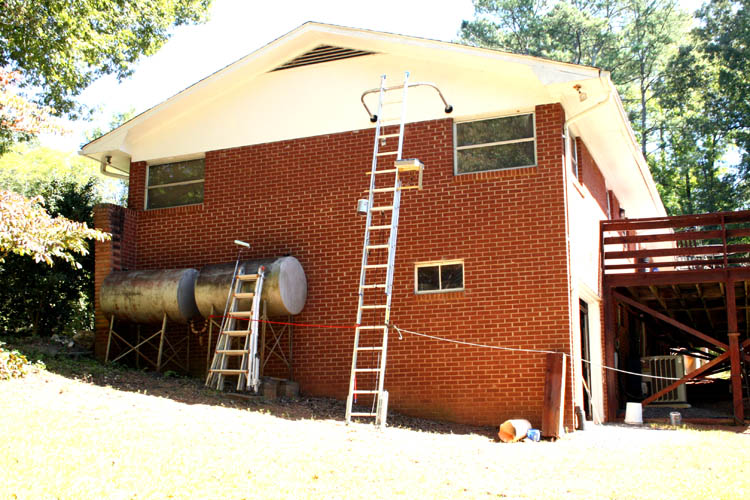
I gave the above paint roller tray holder a test run today on 10-09-2023 and
totally stoked with the way it performed. It cut the labor time in
half as in reference to painting the South end of our home.
It took only two (2) hours to complete and I rolled most of the paint
using a nine (9) inch Mohair roller and used a twelve (12) feet
telescopic paint roller pole. I didn't have to use the A-Frame
ladders and only had to move the Werner twenty four (24) feet extension
ladder four (4) times.
The ladder leg leveler is a must and works on either side of the ladder
as needed!
It was a dawg to control the 12 feet paint roller pole extended out when
rolling in a east to west direction, but it saved
from moving the ladder no more times than necessary. I did some
serious praying while on the extension ladder, even though I had it
secured right and left with a couple ropes, but it was probably more of
a confidence thing than actual safety, but everything worked out fine!
I used a paint brush just a little on the frieze boards.
Next year, I will probably paint the two 260 gallon home heating fuel
tanks since the aluminum paint has weathered badly over the decades.
NOTE: When I took a shower, my right thumb pulled in tight
to the palm of the hand a few times and had to pull the thumb out; that was no doubt
caused by the 12 feet paint roller extension pole having to grip it so
tight; grin if you must!
Come cold weather, I will put the roof ventilator covers back on to
conserve some heat.
Web page updated by Bill aka Mickey Porter on 10-09-2023.
LEAVING ON A
SPIRITUAL NOTE
If you do not know Jesus Christ as your Lord and Savior, please take
this moment to accept him by Faith into your Life, whereby Salvation
will be attained.
Ephesians 2:8 - 2:9 8 For by grace are ye saved through
faith; and that not of yourselves: [it is] the gift of God: 9 Not of
works, lest any man should boast.
Hebrews 11:1 “Now faith is the substance of things hoped for,
the evidence of things not seen.”
Romans 10:17 “So then faith cometh by hearing, and hearing by
the word of God.”
Open this
link about faith in the King James
Bible.
Romans 10:9 “That if thou shalt confess with thy mouth the
Lord Jesus, and shalt believe in thine heart that God hath raised him
from the dead, thou shalt be saved.”
Open this
link of Bible Verses About Salvation,
King James Version Bible (KJV).
Hebrews 4:12 “For the word of God is quick, and powerful, and
sharper than any two edged sword, piercing even to the dividing asunder
of soul and spirit, and of the joints and marrow, and is a discerner of
the thoughts and intents of the heart.”
Romans 6:23 “For the wages of sin is death; but the gift of
God is eternal life through Jesus Christ our Lord.”
Romans 3:23 “For all have sinned, and come short of the glory
of God;”
Micah 6:8 “He hath shewed thee, O man, what is good; and what
doth the LORD require of thee, but to do justly, and to love mercy, and
to walk humbly with thy God?”
Philippians 4:13 "I can do all things through Christ which
strengtheneth me."


